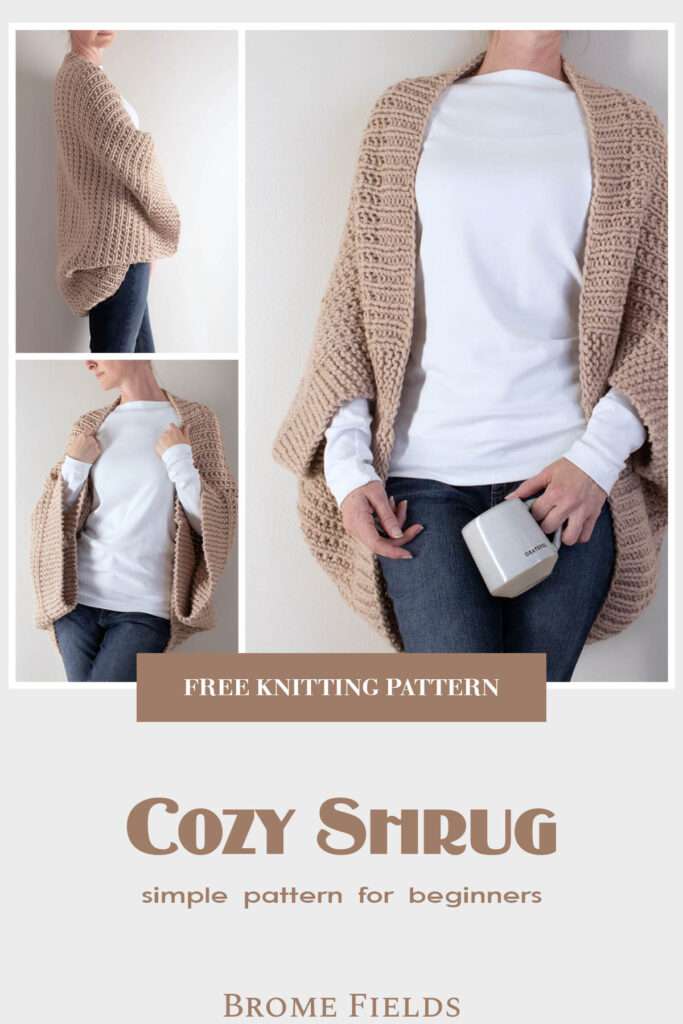
Cozy Shrug Knitting Pattern
This post may contain affiliate links. Please read my disclosure policy.
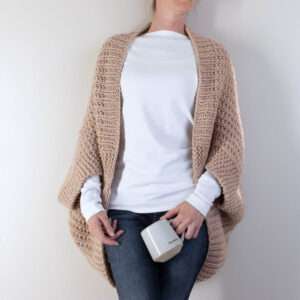
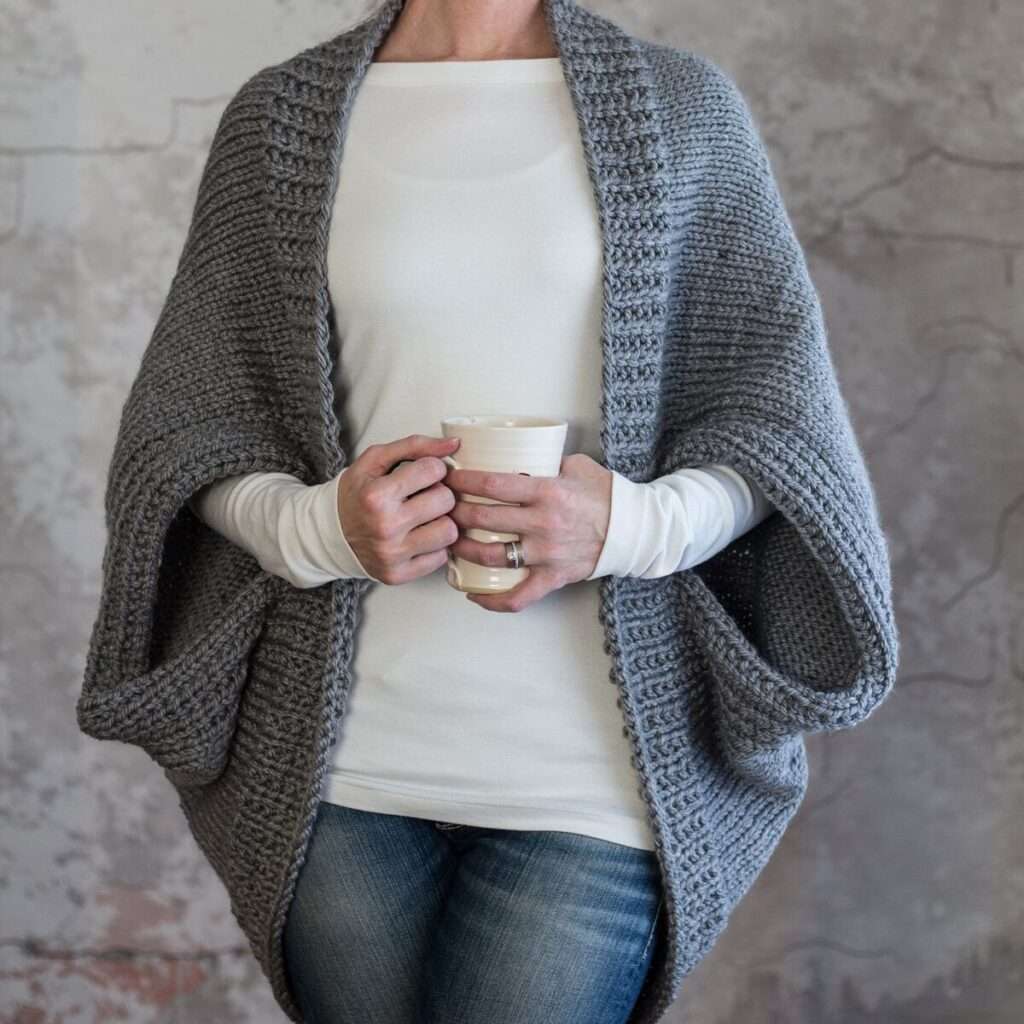
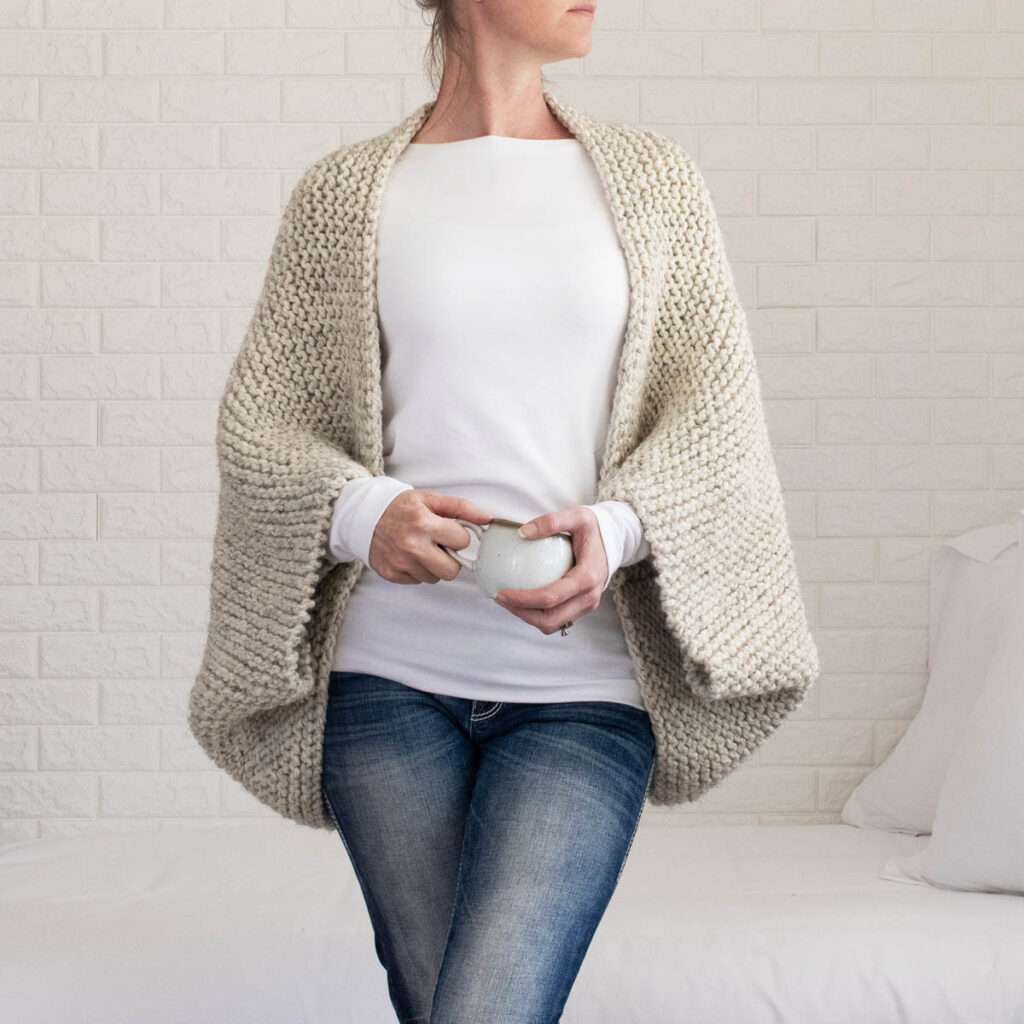
This cozy shrug knitting pattern makes the perfect fall & winter accessory! Using a puffy stitch that gives you a beautifully relaxed drape, without blocking, and extra warmth.
And it’s easy enough for a beginner too!
Pin-it to Pinterest for Later!
About the Pattern
Shrugs, aka blanket sweaters, are so easy! No one will guess that it’s just a rectangle. All you do is knit one rectangle and then sew the sides to create the armholes. This shrug pattern is easy enough for a beginner knitter too. 😍
This is a simple shrug pattern using only knit & purl stitches and it’s a 2-row repeat making it easy to memorize too.
- Available Sizes: Six
- Pattern Format: Written Pattern, No Chart
- Pattern Language: English
- Skill Level: Beginner
- PDF Format: Printer Friendly
- Pattern Name: Wishing & Hoping
How to Wear a Knitted Shrug
- It looks great worn with jeans, yoga pants or pajamas. ;) I love the versatility.
- It’s perfect to snuggle up on the couch watching your favorite movie while knitting.
- It’s a great accessory to keep at your desk to ward off the cold air from the A/C too!
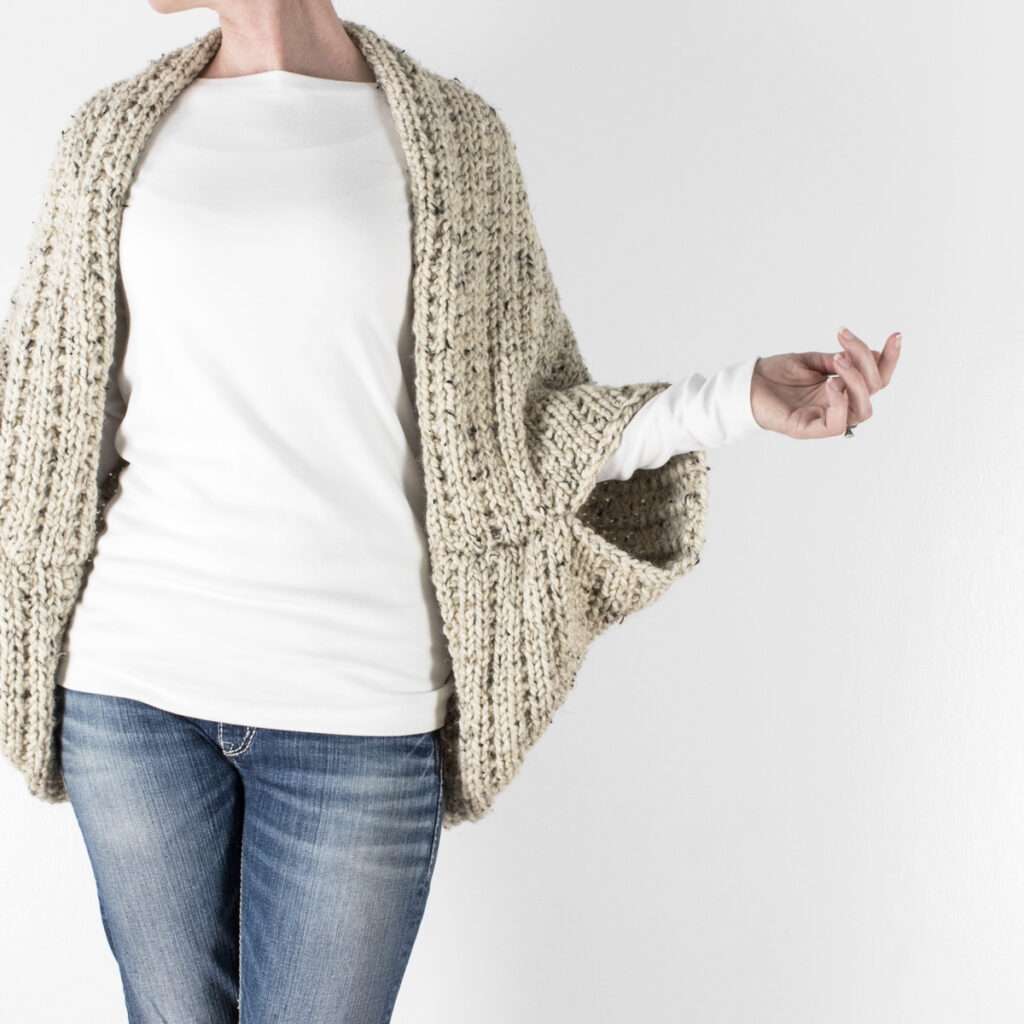
I’ve noticed that it doesn’t stay on my shoulders if I’m active, but it’s perfect for lounging around in.
Knitting Techniques
It’s knit flat, back and forth, using circular cable needles to hold the large number of required stitches. Keep in mind that you won’t be joining it in the round. You’ll knit the stitches as if you’re using straight knitting needles.
Here are some of the knitting skills you need to know before getting started:
- Knit Flat (Back & Forth)
- Knit & Purl Stitches
This pattern is for you, if you know the difference between:
- the right and wrong side of your work.
- a knit stitch and a purl stitch.
Yarn & Substitutions
Yarn Weight: Bulky Weight Yarn
Yardage: 375 – 875 yds (342 – 800 meters)
Suggested Yarn: Lion Brand Hue + Me in Bellini
Hue + Me is a bulky weight acrylic and wool blend yarn. I’ve enjoyed knitting with it and it’s soft enough. It’s not cashmere or silk, I’d call it more of a rustic yarn. It’s not itchy, but it’s not super soft either, just somewhere in the middle. I love the weight of it and haven’t found a perfect substitute.
So, I went to the library aka YarnSub.com to see what they suggest. One that they recommend is Berroco Vintage Chunky, which just so happens to be one of my current favorite yarns. In my opinion, it’s a little thin for a direct substitute, but it might work if you pair it with a fingering weight yarn maybe even a different color adding some depth, creativity and uniqueness.
There are a few recommendations for different Knit Picks yarns that I need to try!
Expert tip: When using a yarn substitute, I highly recommended knitting a swatch to know your gauge.
Needles & Notions
Needle Size: US 13 {9 mm} Circular Knitting Needles with a 32” {80 cm} Cable, or longer (knit flat, not joined in the round)
Darning or Tapestry Needle
Scissors
Gauge
10 STS & 14 rows per 4” (10cm) square, knit in the broken rib pattern, without blocking
Measurements
Model is 5’9″/175cm, 130lbs with a 33″/84cm chest, 27″/68cm waist wearing a 41″ width poncho.
# of CO stitches: 101
Measurements (w/o blocking): 41″ wide x 36″ (104cm x 91cm)
Weight: 1lb. 3.9oz (565g)
Save this pattern for later!
Sizes
Size S: 35×30” {89-76cm}, CO 83 STS, 3-4 skeins
Size M: 37×32” {94-81cm}, CO 89 STS, 3-4 skeins
Size L: 39×34” {99-86cm}, CO 95 STS, 4-5 skeins
Size XL: 41×36” {104-91cm}, CO 101 STS, 4-5 skeins
Size 2XL: 43×38” {110-97cm}, CO 107 STS, 5-6 skeins
Size 3XL: 45×40” {116-102cm}, CO 111 STS, 6-7 skeins
This pattern is easily customizable. Make it longer or shorter depending on your bust & waist sizes & style. For a larger bust or waist you may want to make it a little wider and/or longer, depending on your size & style. ;)
Notes
Not reversible.
Knit top down.
Knit using the broken rib stitch, rib stitch & garter stitch.
The CO edge is the width, across your shoulders.
This is a rectangle with the sides sewn to create “sleeves.”
This is a custom pattern, made to fit your body and your style.
A circular needle is used to accommodate the large number of CO stitches.
I like to place a stitch marker after the first 8 stitches and before the last 8 stitches. It’s just a physical reminder where the pattern changes so I don’t have to count stitches.
Modification Options
You can knit this using a worsted weight yarn, but you’ll need to cast-on more stitches. Maybe try going up one or two sizes. That’s a good place to start. :)
Another option would be, not to seam it and leave it as a throw blanket! ;)
You can knit this using a super bulky yarn, but you’ll need to cast-on fewer stitches. Maybe try going down one or two sizes. That’s a good place to start. :)
Knitting Abbreviations
*– * – repeat between * to end of round
BO – bind-off in pattern
CO – cast-on (long-tail cast-on method)
K – knit stitches (K1 means to knit 1 stitch)
P – purl stitches (P2 means to purl 2 stitches)
PM – place marker
STS – stitches
Download & Print this Pattern
Do you enjoy working from a paper copy? Get the downloadable, printer-friendly PDF completely ad-free.
That way you can have lifetime access to it and download it to any device and view it from anywhere, without ads (and the pattern might not be around forever).

Pattern Instructions
 |
 |
 |
It’s knit flat, row-by-row, back and forth, using circular knitting needles. The circular needles are needed to hold the large number of stitches, so don’t join it in the round. You’ll knit the stitches as if using straight knitting needles.
CO the number of STS from the chart above.
Collar Ribbing {about 2 1/2”/6cm}:
Row 1.3.5.7 {WS}: K8, *P1, K1* last 9 STS: P1, K8
Row 2.4.6 {RS}: K8, *K1, P1* last 9 STS: K9
Shrug Body:
Row 8 {RS}: *K*
Row 9 {WS}: K8, *P1, K1* last 9 STS: P1, K8
Repeat rows 8-9 for desired length. The length will depend upon your height. I’m 5’ 9” with a long torso. I made mine 36” long, just below my bum, so it covers my bum and so that it has that “scoop” to it that I like.
Bottom Ribbing {about 2 1/2”/6cm}:
Row 1, 3, 5, 7 {RS}: K8, *K1, P1* last 9 STS: K9
Row 2, 4, 6, 8 {WS}: K8, *P1, K1* last 9 STS: P1, K8
Row 9 {RS}: BO in pattern.
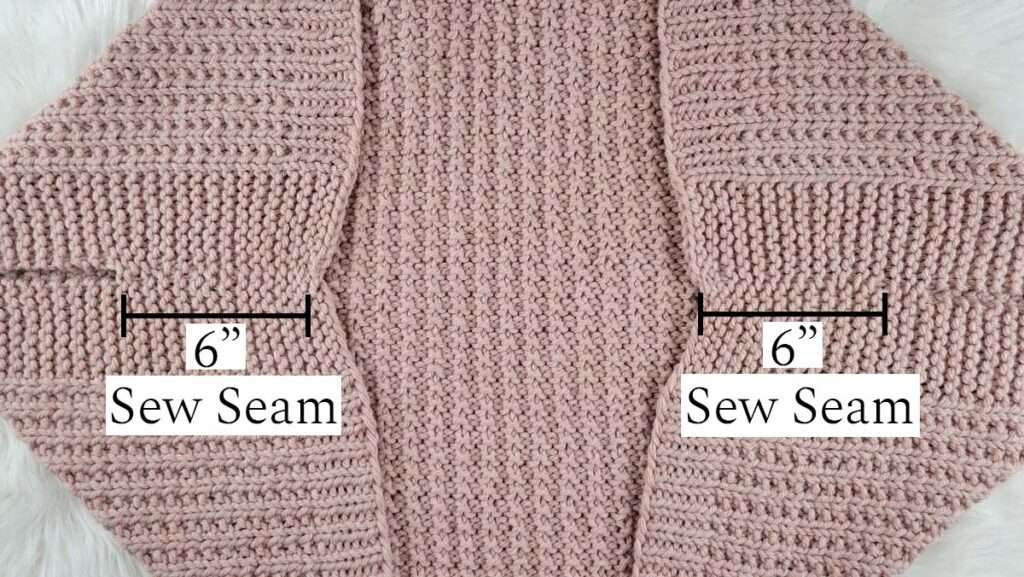
How to Create the Sleeves:
For the first sleeve, lay it flat, with the wrong side up.
On a short side, bring the CO and BO corners together.
Sew from the edge in, to create the sleeves.
How far up you sew depends on the size you’re making. I sewed mine about 6” {15cm}.
Repeat on the other side to create the other sleeve.
Weave in the ends.
Blocking is optional.
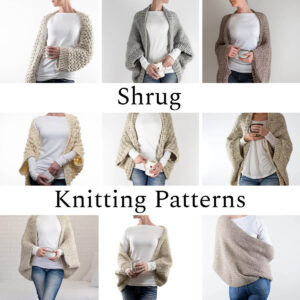
More knit shrug patterns you’ll love
|
|
|
|