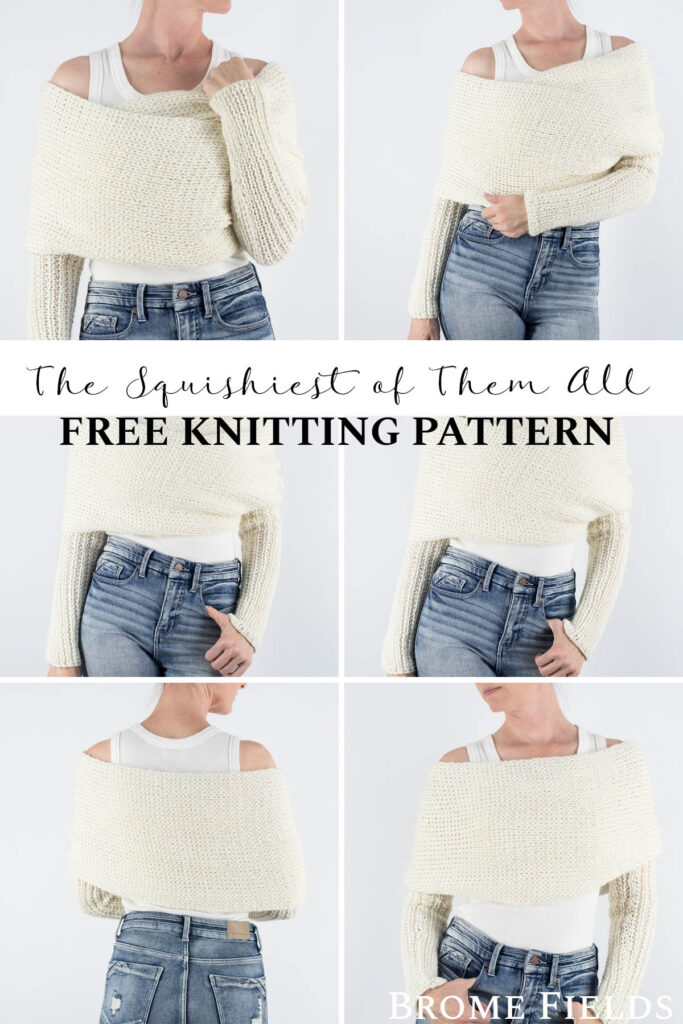
The SQUISHIEST Sweater Scarf of Them All
This post may contain affiliate links. Please read my disclosure policy.
Wrap Yourself in Luxury: The Must-Have Sweater Scarf of the Season
Looking for the perfect blend of style, warmth & versatility? Meet the sweater scarf—a chic, ultra-cozy knitwear that’s knit similar to a scarf but stays in place like your favorite sweater.
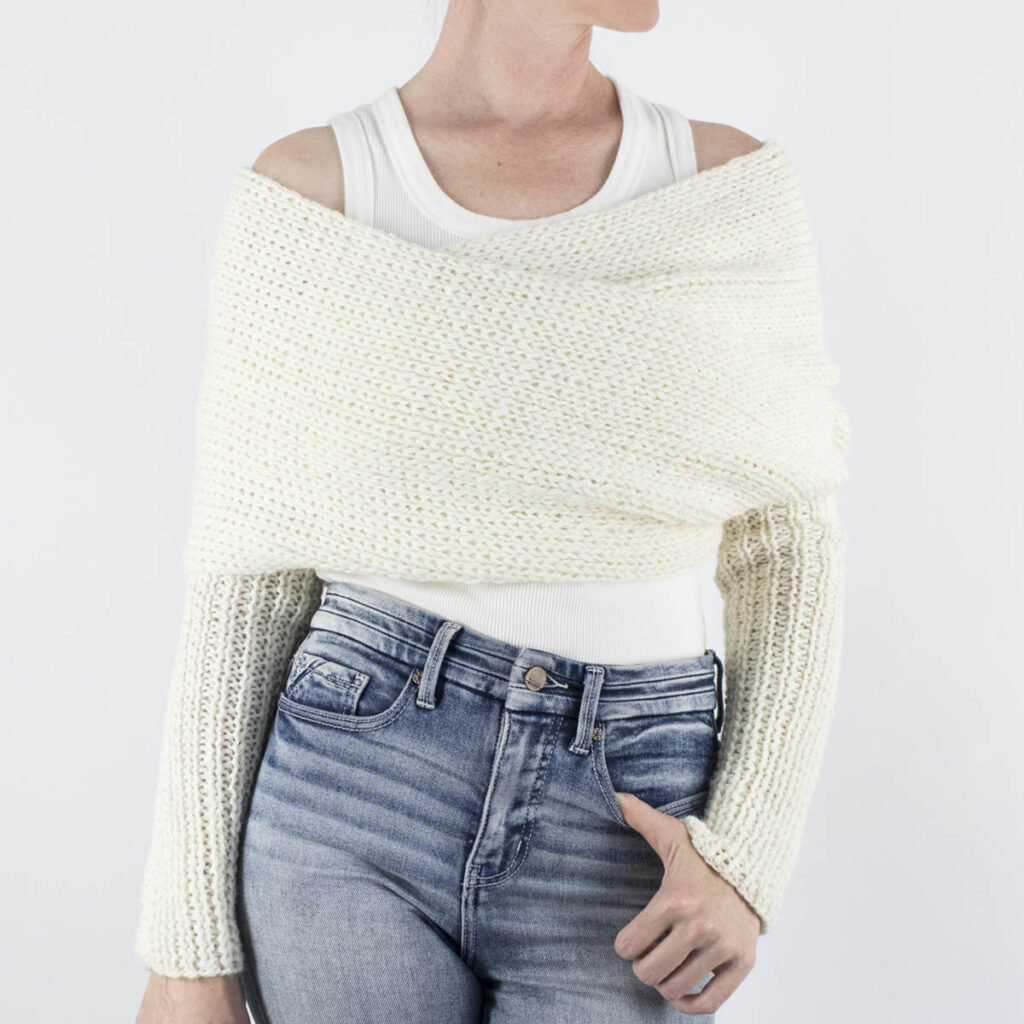
Crafted with DK weight yarn, this lightweight yet warm accessory is designed for effortless layering, giving you that perfect “wrapped in a hug” feeling without the bulk.
But what really sets this piece apart? The rib stitch. This simply beautifully textured, ultra-squishy fabric gives it a luxurious drape and stretch, making it as comfortable as it is stylish.
Whether you’re heading out for a crisp morning stroll, cozying up at home, or looking for that statement piece to elevate your outfit, this sweater scarf has you covered—literally!
The softest & squishiest of them all!
PDF Bonus: The downloadable pattern includes both the knit-flat version (shown on this page) and a knit-in-the-round version.
About the Pattern
This sweater scarf is knit from sleeve to sleeve. There are 2 sets of instructions so you can choose whether you want to knit it flat OR knit it in the round using the magic loop method (no seams!)
- Available Sizes: 7 (XS – 3XL)
- Pattern Format: Written pattern, no chart
- Pattern Language: English
- Skill Level: Advanced beginner*
- PDF Format: Printer-friendly
- Estimated Knit Time: Weekend project (approx. 24–30 hours, depending on pace and breaks)
- Pattern Name: Wonderlights
*The only thing making this an advanced beginner knitting pattern is that it calls for increase/decrease stitches going from the wrist to body sections, other than that, it’s all knit & purl stitches.
Pattern Features
This cozy sweater scarf pattern is designed to be simple, wearable, and easy to follow. You’ll find clear instructions, helpful photos, and built-in customization tips so you can confidently knit a piece that truly fits your style and body.
- Step-by-step instructions written for clarity and ease
- Helpful progress photos so you know you’re on track
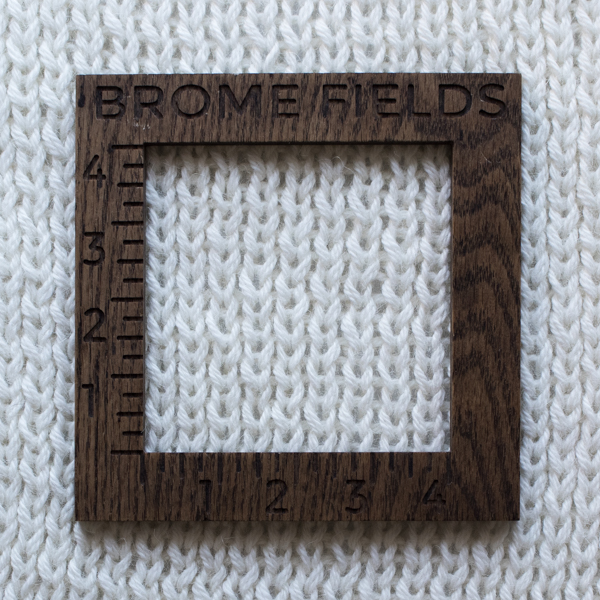
- A visual gauge guide to help you compare your swatch
- A confidence checklist before you begin
- Clear size and measurement guidance
- Customization tips for length and fit
- Beginner-friendly explanations for tricky sections
Techniques
In this post, I’ll walk you through the design, materials, and construction of this stylish and functional knitwear piece. Let’s cast on and create something timeless!
Here are some of the knitting skills you need to know before getting started:
You have a choice to knit it flat OR knit it in the round using the magic loop method (no seams!)
Knit & purl stitches
Increase & decrease stitches
Yarn & Substitutions
Yarn Weight: DK
Yardage: 958 – 1580 yards (876 – 1444 meters)
Suggested Yarn: Galler Yarns Heather Prime Alpaca, Color: Flurry
Worsted Weight Yarn Options:
- Lion Brand Heartland
- Lion Brand Vanna’s Choice
- Caron One Pound
Check out Yarnsub’s for more yarn substitutions.
Needles
Two needle sizes are used to create structured sleeves and a softer, drapier body.
US 10.5 (6.5mm) Circular Needles with a 32” (80cm) Cable, or longer
US 11 (8mm) Circular Needles with a 32” (80cm) Cable, or longer
Gauge
17 STS & 14 rows per 4” (10cm) square, knit in the “body” pattern below
Details
Model Details:
– Height: 5’9″ (175cm)
– Weight: 130lbs (59kg)
– Bust: 35″ (88cm)
– Waist: 25″ (63cm)
# of CO stitches: 33
Total measurements, after steaming: 15″ x 98″ (38cm x 249cm)
Sleeves measures: 7 3/4″ x 19″ (20 x 48cm) each
Body measures 15″ x 60″ (38 x 127cm)
Weight: 14.6oz (410g)
Sizes
| Size | Sleeve Circ. | x | Total Length | # of CO STS | Length of body | Skeins Needed | Meters Needed | Yards Needed |
| XS | 6 1/2″ | x | 94″ | 28 | 56″ | 2 | 876 | 958 |
| S | 7 1/4″ | x | 96″ | 30 | 58″ | 2 | 998 | 1092 |
| M | 7 3/4″ | x | 98″ | 32 | 60″ | 2 | 1089 | 1191 |
| L | 8 1/4″ | x | 100″ | 34 | 62″ | 2 | 1183 | 1294 |
| XL | 8 1/2″ | x | 102″ | 36 | 64″ | 3 | 1244 | 1360 |
| 2XL | 9 1/4″ | x | 104″ | 38 | 66″ | 3 | 1380 | 1509 |
| 3XL | 9 1/2″ | x | 106″ | 40 | 68″ | 3 | 1444 | 1580 |
Measurements:
Sleeve Circ. = sleeve circumference.
Total Length = sleeve-to-sleeve length.
Length of Body = flat section between the sleeves.
Fun Fact:
According to Scientific American “A person’s arm span is about equal to their height.” Taking that fun fact into consideration, you may want to knit more or fewer rows than recommended in the chart, depending on your height.
Notes
- Not reversible.
- Knit using the rib stitch.
- Knit flat from side to side.
- OR knit in the round using the magic loop method.
- Knit holding 2 strands of yarn together throughout.
- Keep in mind, I’m 5’9″, so if you’re knitting this for a 5’4″ person, you may want to take off a few inches in length, in the arms and/or body.
- The “Length of body section” measurements are AFTER I steamed it. I steamed it as I went, so I could try it on to make sure it fit correctly. Honestly, the stitches feel so much better after it’s been steamed too. 🙂 They were nice and relaxed and it felt like something I wanted to wear immediately, so it helped keep me excited to finish it.
Knitting Abbreviations
*– * – repeat between the asterisks to end of row
BO – bind-off in pattern
CO – cast-on (long-tail cast-on method)
K – knit stitches (K1 means to knit 1 stitch)
K2TOG – knit 2 stitches together
KFB – knit the stitch, before slipping off, knit another stitch into the back of the same stitch, slip to right needle
P – purl stitches (P2 means to purl 2 stitches)
P2TOG – purl 2 stitches together
RS – right side
STS – stitches
WS – wrong side
Save it for Later
- Buy the ad-free, printer-friendly pattern in the shop.
- Save it to your Ravelry Library!
- Pin-it to Pinterest for later.
Don’t miss out on this must-have knitting project. Keep reading to discover how to create your own and why this will be your go-to handmade accessory for seasons to come!
Download & Print this Pattern
Do you enjoy working from a paper copy? Get the downloadable, printer-friendly PDF completely ad-free.
That way you can have lifetime access to it and download it to any device and view it from anywhere, without ads (and the pattern might not be around forever).
PDF Bonus: The downloadable pattern includes both the knit-flat version (shown on this page) and a knit-in-the-round version.
What’s to love?!
People love sweater scarves (or scarves with sleeves) because they combine the cozy warmth of a scarf with the practicality of a sweater. Here are some key reasons why they’re so popular:
1. Cozy & Comfortable
- Made with soft, warm fabrics, they wrap the wearer in warmth like a traditional scarf but stay securely in place with sleeves.
- Perfect for layering over other outfits without feeling restrictive.
Save this pattern for later!
2. Stylish & Versatile
- Can be worn in multiple ways—draped over the shoulders, wrapped around like a shawl, or styled like an oversized scarf.
- Looks chic and effortlessly elegant while being incredibly functional.
3. Practical & Hands-Free
- Unlike traditional scarves that might slip off, sweater scarves stay put, keeping the wearer warm without constant readjustment.
- Sleeves provide extra warmth for arms without the bulk of a full sweater.
4. Great for Transitional Weather
- Ideal for in-between seasons like fall and spring when a full coat is too much, but a simple scarf isn’t enough.
- Perfect for layering over lightweight tops or sweaters.
5. Easy to Knit & Customize
- A favorite among knitters because they offer an opportunity to play with textures, stitch patterns, and yarn weights.
- Can be made oversized, fitted, or even with fun details like pockets or buttons.
Pattern Instructions, Knit Flat
PDF Bonus: The downloadable pattern includes both the knit-flat version (shown on this page) and a knit-in-the-round version.
Using US 9 (5.5mm) circular needles
CO 28 (30, 32, 34, 36, 38, 40) STS for sizes XS (S, M, L, XL, 2XL, 3XL) using the long tail cast-on method, Italian cast-on or your favorite stretchy cast-on method. See the Size Chart section above for more details.
Sleeve Rib Section (All Sizes):
All Rows: *K1, P1* for approx. 18″ (45cm), or desired length (it’ll loosen & relax when steamed). Feel free to customize the length to suit your body and preferred fit.
Increase Row: (Read This Section Before You Knit the Row).
Next Row (RS): *INC1, K1, INC1, P1*, doubling the number of stitches.
On this row, you’re increasing one stitch between every existing stitch. This means that for each knit or purl stitch you work, you’ll also add an increase beside it. By the end of the row, your stitch count will be doubled.
Written out step by step:
Increase 1 stitch
Knit 1 stitch
Increase 1 stitch
Purl 1 stitch
Then repeat that exact sequence across the entire row.
By increasing between each stitch, the fabric widens quickly to create the body section.
Example: If you cast on 30 stitches, you will have 60 stitches after the increase row.
Pause here and count your stitches before continuing. Your stitch count should be exactly double your cast-on number before moving on. If it isn’t, it’s much easier to fix it now than later.
Here’s a video tutorial for this increase row if you’d like to see it worked step by step.
First 8 rows of the body (rib stitch):
Next 8 Rows: *K1, P1*
Body:
Needle Change: Switch to US 11 (8mm) circular needles. Switching to larger needles creates a softer, drapier body section while keeping the sleeves structured.
All Rows: *K1, P1* repeat until desired length minus 1 1/2″ (4cm), measured from the end of the sleeve rib section across the body only 56″ (58, 60, 62, 64, 66, 68) for sizes XS (S, M, L, XL, 2XL, 3XL), or desired length. Give it a light steam and slip it on while you’re knitting. You’ll get a much better feel for the final fit. Feel free to customize the length to suit your body and style.
Last 8 rows of the body:
Needle Change: Switch back to US 9 (5.5mm) circular needle before beginning the second sleeve rib section. This creates a firmer fabric that matches the first sleeve.
Next 8 Rows: *K1, P1*
Decrease Row:
Row 9 (RS): *K2TOG, P2TOG* K1 (knit 2 and then purl 2 stitches together throughout the row.) At the end of the row you should have the same number of stitches you cast-on 28 (30, 32, 34, 36, 38, 40) for sizes XS (S, M, L, XL, 2XL, 3XL).
Example: If you CO 30 STS, you should have 30 STS after the decrease row.
Pause here and count your stitches before continuing. Your stitch count should be exactly the same as your number of cast-on stitches.
Sleeve Rib Section (All Sizes):
All Rows: *K1, P1* for approx. 18″ (45cm), or desired length (it’ll loosen & relax when steamed). Knit this section to match the length of the first sleeve.
Bind-Off:
BO, on a right side row, in the K1, P1 rib pattern using a medium, relaxed tension. However, avoid binding off too loosely, as this can cause the edge to flare.
If you prefer a professional edge, the Italian tubular BO is a great option.
You’re almost there. At this point, you’ll have two matching ribbed sleeves at either end of the scarf body. Once the sleeves are seamed, the finished piece will come together beautifully.
Seam Sleeves:
This seam closes the underside of each sleeve. Use a tapestry needle and the same yarn for seaming to keep the finish seamless and flexible.
Lay the piece flat with the wrong side facing up. Fold each ribbed section in half. At the cast-on end, bring the first and last stitches together and seam along the ribbed section to form the first sleeve.
Repeat this process at the bind-off end to form the second sleeve.
Weave in the ends.
Steaming:
Don’t skip this step. Steaming really pulls everything together, turning it into something you’ll feel proud to wrap up in again and again.
Lightly steam the finished piece to even out stitches and encourage a relaxed drape. Steaming helps smooth out uneven tension, soften the fabric, and allows the garment to relax into its final shape and measurements before wearing. This final step gives the piece its signature drape and finish, transforming it from handmade to beautifully finished.
Video – How to Wear Your Sweater Scarf
More knitting patterns that you’ll love…
- Chunky Triangle Scarf Shawl – This triangle shawl is a quick knit with big style. Wrap yourself in cozy texture with just knit stitches and super bulky yarn.
- Modern Poncho Knitting Pattern – Knit a chic layer you’ll actually wear — no shaping, just two rectangles and simple seams. Perfect for beginners ready to level up.
- The Ultimate Bundle – get access to 275+ cozy, beginner-friendly patterns — all in one place.
- Sweater & Top Knitting Patterns Bundle – Build your handmade wardrobe with cozy, confidence-boosting patterns. These beginner-friendly garments are stylish, wearable, and fun to knit.
PDF Bonus: The downloadable pattern includes both the knit-flat version (shown on this page) and a knit-in-the-round version.