Horseshoe Cable Knitting Stitch Pattern
This post may contain affiliate links. Please read my disclosure policy.
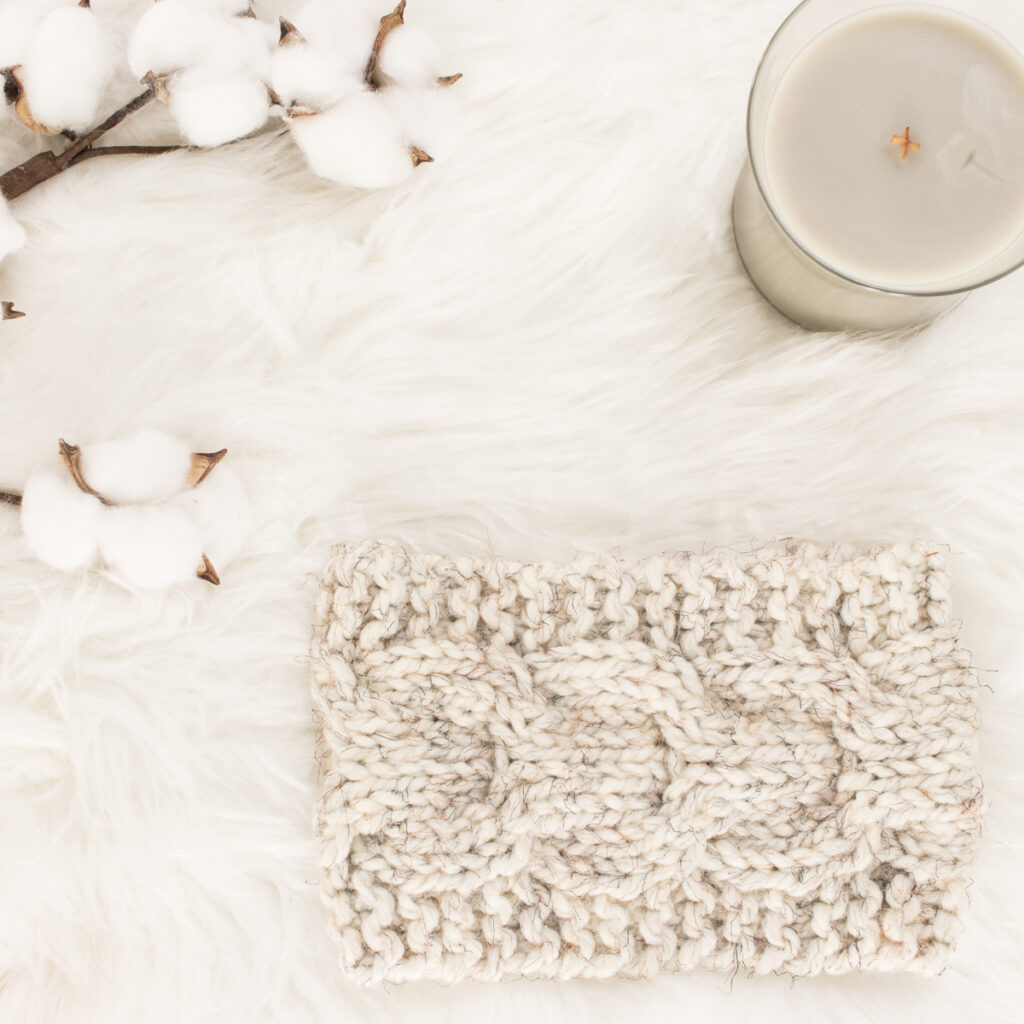
Learn how to knit the Horseshoe Cable Knitting Stitch in this video tutorial and add a beautiful cable stitch panel to your hand knitted sweater.

About the Stitch
This cable stitch is easier than it looks! It’s an 8-row repeat, but only 1 row has cable stitches. ;)
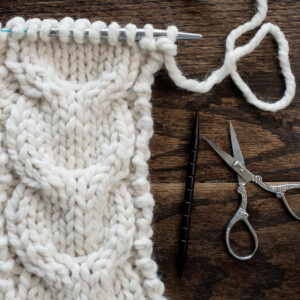
This horseshoe cable stitch consists of 2 cable stitches using 4 stitches each. On one row you’ll create a right leaning and then a left leaning cable stitch. You’ll create them back to back to create this beautiful cable knit stitch.
If you’re knitting a stockinette stitch sweater or hat and you’d like to add this cable pattern, having a few reverse stockinette stitches on either side of your cable will give it more definition, so it “pops.”
The Horseshoe Cable Stitch is also known as the Wishbone Stitch.
This is not a reversible pattern, meaning that the front and back are not the same.
There aren’t any increases or decreases, so you should always have the same number of stitches on the needles.
Skill level : Intermediate / Advanced Beginner
Yarn, Needles & Notions
Yarn Weight: Super Bulky
Yardage: 35-45 yds (32 – 41 meters)
Suggested Yarn: Lion Brand Wool Ease Thick & Quick
Needle Size: US 11 (8 mm) Knitting Needles
Cable Needle
Darning Needle / Tapestry Needle/ Yarn Needle
Scissors
* I like using DPN’s for a small swatch, it’s easier on my hands than full length straight needles
Yarn Substitutions
You can use any yarn you’d like. To get the right gauge, start with the recommended needle size. If you’re stitches are too loose, use smaller needles and if you’re stitches are too tight use larger needles.
Super Bulky Yarn Substitutes:
Check out Yarnsub’s for more yarn substitutions.
Save this pattern for later!
Video Tutorial
Music by Ben Sound
Horseshoe Cable Stitch Pattern Instructions
Knit flat using straight needles
CO 12 STS
Row 1, 3, 5 (RS): *P2, K8, P2*
Row 2, 4, 6, 8 (WS): *K2, P8, K2*
Row 7 (RS): *P2, C4B, C4F, P2* (cable row)
Repeat rows 1-8, until desired length
Checklist
Row 1 (RS): *P2, K8, P2*
Row 2 (WS): *K2, P8, K2*
Row 3 (RS): *P2, K8, P2*
Row 4 (WS): *K2, P8, K2*
Row 5 (RS): *P2, K8, P2*
Row 6 (WS): *K2, P8, K2*
Row 7 (RS): *P2, C4B, C4F, P2* (cable row)
Row 8 (WS): *K2, P8, K2*
Repeat rows 1-8, until desired length
Expert tip:
Place a stitch marker after the first 2 stitches and before the last 2 stitches, to separate the edge stitches from the cable stitches in the center.
Cable Stitch Inspiration
This cable stitch pattern looks amazing with all types off knitwear. Below is some inspiration:
Hats
Sweaters
Headbands
Blankets
Abbreviations
*– * – repeat between * asterisks
CO – cast-on (long-tail cast-on method)
C4B – cable 4 back – right leaning cable – transfer 2 stitches to a cable needle and hold it in the back of your work, knit the next 2 stitches and then knit the 2 stitches off the cable needle
C4F – cable 4 front – left leaning cable – transfer 2 stitches to a cable needle and hold it in the front of your work, knit the next 2 stitches and then knit the 2 stitches off the cable needle
K – knit stitches (example: K1 means to knit 1 stitch)
P – purl stitches (example: P2 means to purl 2 stitches)
RS – right side
STS – stitches
WS – wrong side
Right Side Rows / Front of Work

Patterns Using the Horseshoe Cable Knit Stitch
Horseshoe Cable Headband Knitting Pattern
Horseshoe Cable Knitting Stitch Pattern
Equipment
- Knitting Needles (Recommended Size for Yarn)
Materials
- Any Yarn
Instructions
- CO 12 Stitches
- Row 1, 3, 5 (RS): *P2, K8, P2*
- Row 2, 4, 6, 8 (WS): *K2, P8, K2*
- Row 7 (RS): *P2, C4B, C4F, P2* (cable row)
- Repeat rows 1-8, until desired length
Abbreviations
- *– * – repeat between asterisks
- CO – cast-on (long-tail cast-on method)
- C4B – cable 4 back – right leaning cable – transfer 2 stitches to a cable needle and hold it in the back of your work, knit the next 2 stitches and then knit the 2 stitches off the cable needle
- C4F – cable 4 front – left leaning cable – transfer 2 stitches to a cable needle and hold it in the front of your work, knit the next 2 stitches and then knit the 2 stitches off the cable needle
- K – knit stitches (example: K1 means to knit 1 stitch)
- P – purl stitches (example: P2 means to purl 2 stitches)
- RS – right side
- STS – stitches
- WS – wrong side