Easy Sock Knitting Pattern
This post may contain affiliate links. Please read my disclosure policy.
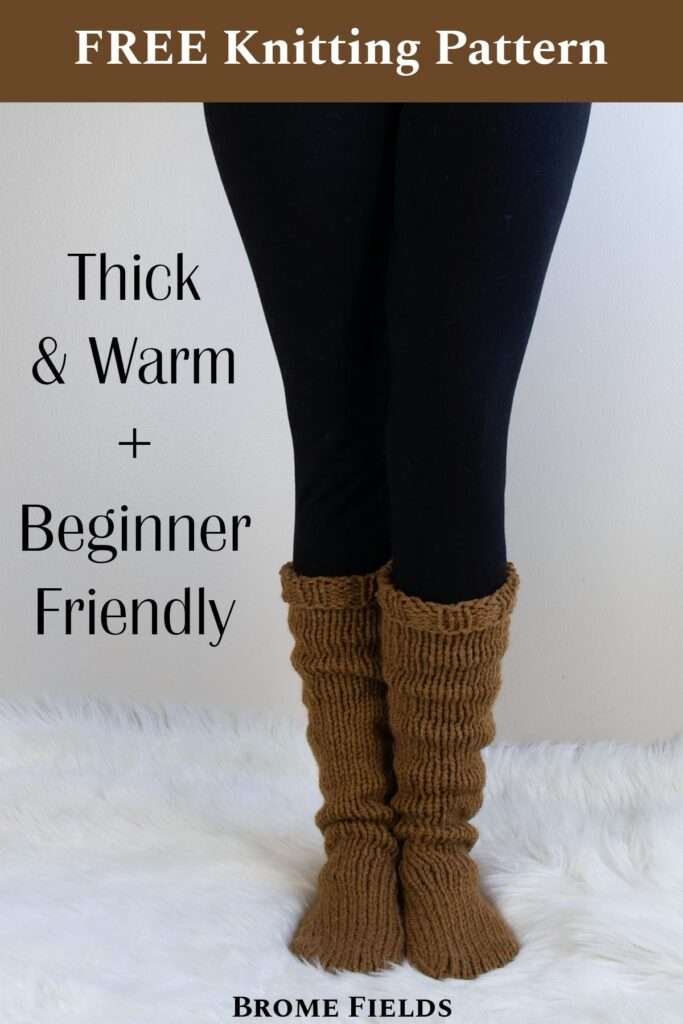
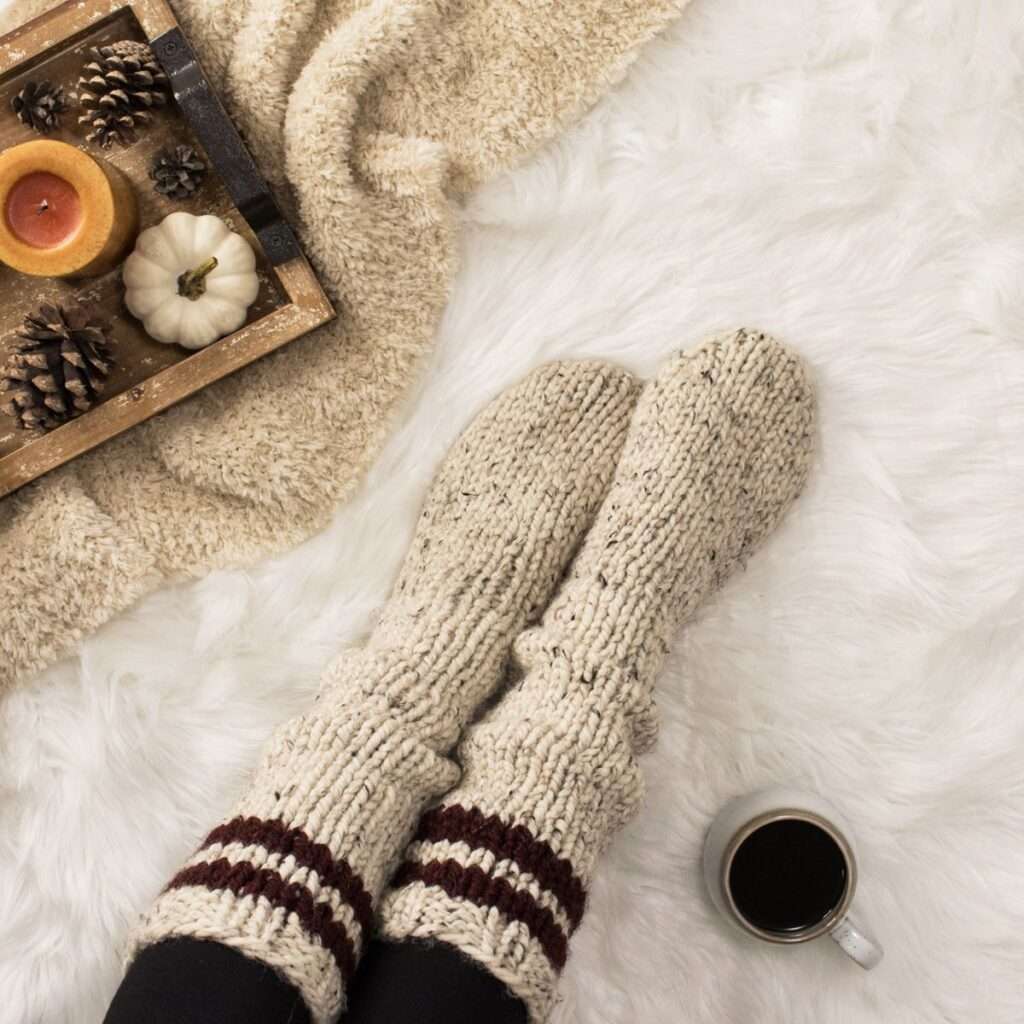
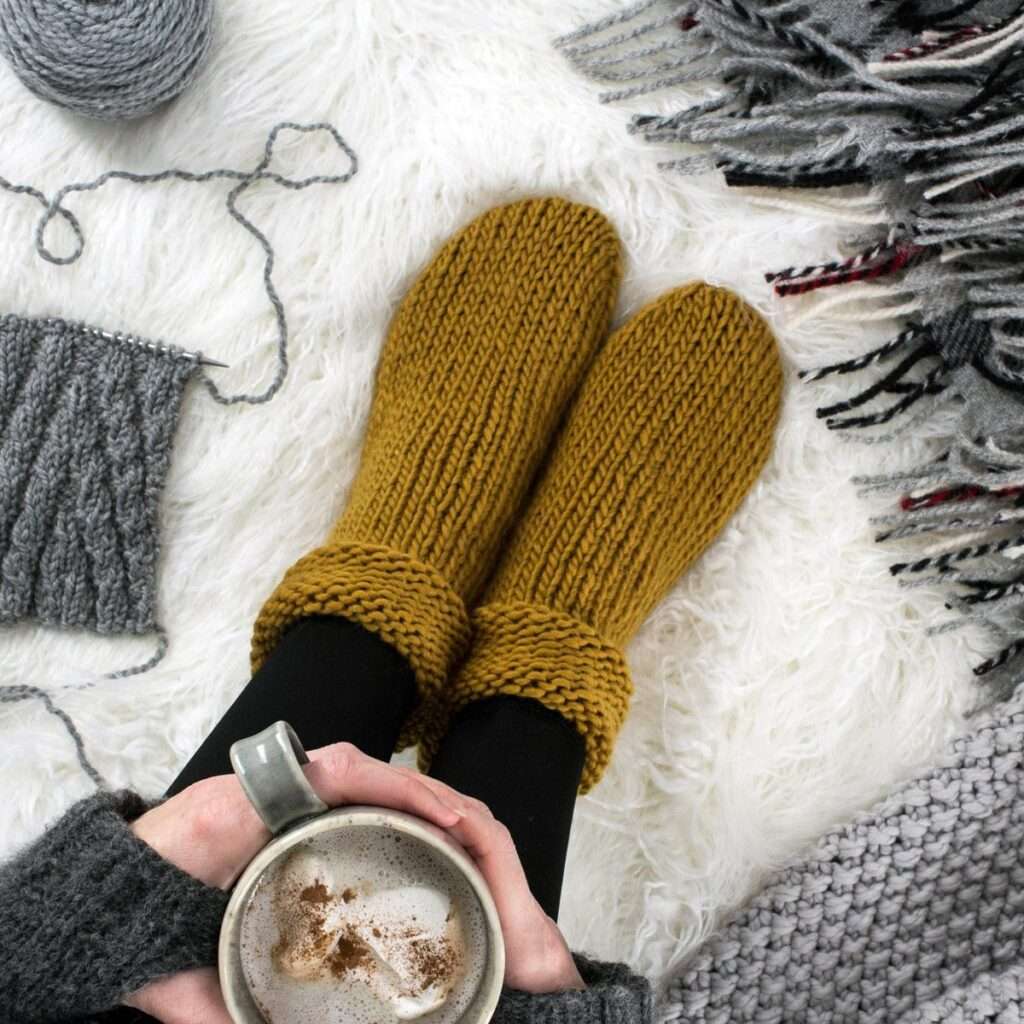
Are you looking for an easy sock knitting pattern? This is a simple tube sock knitting pattern, that’s great for a beginner sock knitter!
About the Sock Pattern
Knitting socks for beginners seems intimidating. It is still does for me and I’m not a beginner. lol! This simple sock knitting pattern will help you complete a pair of socks, so you can see how they come together from start to finish. All while building your confidence to knit a sock with a short row heel. (I’m almost there!)
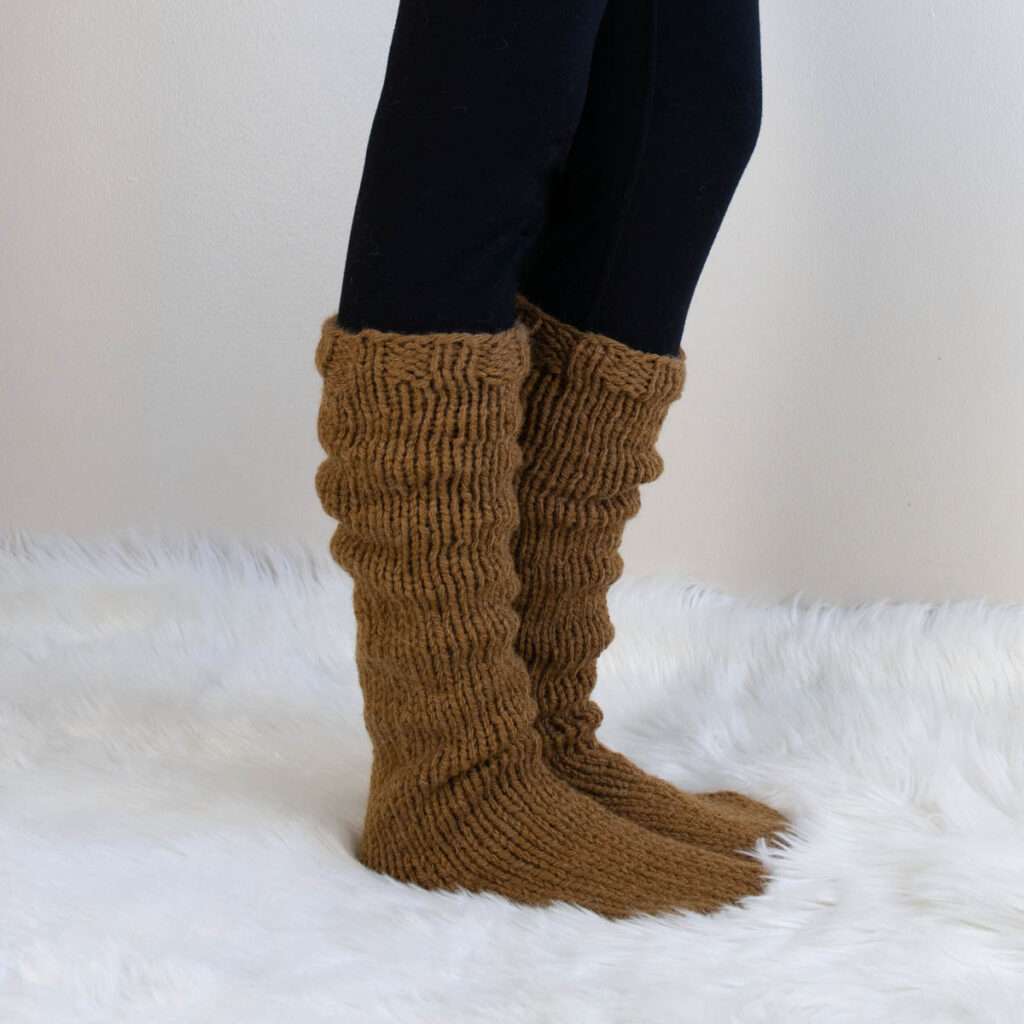
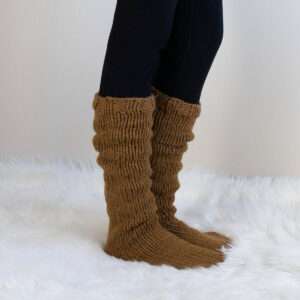
This is an easy sock knitting pattern that’s knit in a long tube, without a heel flap.
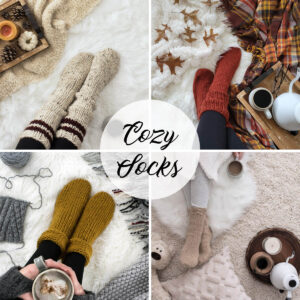
I like to call these cozy cabin socks, I have several free sock knitting patterns that I’ve written over the years, because they’re great to grab after a long day and you want to feel comfy & cozy while decompressing from the day… or week.
There are 2 variations of this pattern, one is toe-up and the other is top-down. You get to pick how you’d like to knit them.
They’re both knit in the round using the magic loop method. If you’re not familiar with this method you can check out this video tutorial by Knit Picks or photo tutorial by Tin Can Knits.
There’s a video below to show you how to get a seamless toe using the kitchener stitch in the top- down pattern.
- Available Sizes: One, easily customizable
- Pattern Format: Written Pattern, No Chart
- Pattern Language: English
- Skill Level: Advanced Beginner
- PDF Format: Printer Friendly
- Bonus: Video
Techniques
Here are some of the knitting skills you need to know before getting started:
- Knit in the Round, Magic Loop Method
- Knit & Purl Stitches
- Decrease Stitches (Top Down)
- Increase Stitches (Toe Up)
Knitting Stitches Used
If you’re new to knitting and not quite ready to learn how to knit socks with heels, then these tube socks are a great alternative.
These socks are so simple to knit!
- Minimal increases
- Minimal decreases
- No heel flap
Just knit & purl stitches on repeat, except for the toe shaping. Easy enough to watch your favorite reruns and let your fingers do the work!
Stitches:
- Knit & purl stitches mostly.
- Decrease stitches for the top-down pattern
- Increase stitches for the toe-up pattern.
WHAT’S TO LOVE!?
- Thick winter socks
- Warm & Cozy
- Beginner friendly pattern
- Simple design
- Customizable
- Great knit gift idea
Yarn & Substitutions
- Yarn Weight: Bulky
- Yardage: 270 – 275 yards (247 – 251 meters)
- Suggested Yarn: Lion Brand Hue + Me
Hue + Me is a bulky weight acrylic and wool blend yarn. I’ve enjoyed knitting with it and it’s soft enough. It’s not cashmere or silk, I’d call it more of a rustic yarn. It’s not itchy, but it’s not super soft either, just somewhere in the middle. I love the weight of it and haven’t found a perfect substitute.
So, I went to the library aka YarnSub.com to see what they suggest. One that they recommend is Berroco Vintage Chunky, which just so happens to be one of my current favorite yarns. In my opinion, it’s a little thin for a direct substitute, but it might work if you pair it with a fingering weight yarn maybe even a different color adding some depth, creativity and uniqueness.
There are a few recommendations for different Knit Picks yarns that I need to try!
Expert tip: When using a yarn substitute, I highly recommended knitting a swatch to know your gauge.
Thanks to this chunky yarn it’s a relatively quick project too!
If you’re like me and you purchased some sock yarn and then realized how thin it is, you can hold it double, or maybe triple, depending on the thickness of your yarn. Nylon adds strength & durability to the wool, making them last longer. 😉
Needles & Notions
- Needle Size: US 10 1/2 (6.5 mm) Circular Needles with a 32” (80 cm) Cable, or DPNs
- Stitch Marker
- Darning or Tapestry Needle
- Scissors
Note: This pattern is designed for knitting in the round using circular needles, however, if you’re familiar with using DPN’s you can substitute them for the circular needles. Knitting socks on circular needles using the magic loop method was a game changer for me.
Gauge
12 STS & 17 rounds per 4” (10cm) square, knit in stockinette stitch
Measurements
Measurements: 5″ wide x 24″ (13cm x 61cm)
Weight: 6.2oz (180g)
Photo Details
Model Height: 5’9″ (175cm)
Model Calf Circumference: 13″ (33cm)
Notes
Not reversible.
Knit top down or toe up.
Knit using the rib stitch & stockinette stitch.
Knit in the round using the magic loop method with a circular needle.
When knitting in the round you’re always knitting the right side of your work.
Modification Options
This pattern is available in one size, however, it’s easy to customize.
- For a wider foot circumference, cast-on 4 more stitches, or more in multiples of 4
- For a narrower foot circumference, cast-on 4 fewer stitches, or more in multiples of 4.
- For a smaller foot length, knit fewer rows.
- For a longer foot length, knit more rows.
- To make them go over your knee, knit more rows.
- To make them shorter for ankle socks, knit fewer rows.
Save this pattern for later!
This is a basic pattern, a starting point really, for you to be creative and design your own version to fit your style.
Add some colorwork to your socks and use up some leftover yarn.
This pattern doesn’t include a cuff, but if you’d like one, just knit more rows in the *K2, P2* pattern about twice the size you want your cuff. For example, if you’d like a 3″ cuff, knit in the *K2, P2* pattern for 5 1/2-6″.
Knitting Abbreviations
*– * – repeat between * to end of round
BO – bind-off in pattern
CO – cast-on (long-tail cast-on method)
INC1 – make 1 stitch (I use a backwards loop)
K – knit stitches (K1 means to knit 1 stitch)
K2TOG – knit 2 stitches together
P – purl stitches (P2 means to purl 2 stitches)
PM – place marker
SKP – slip 1 stitch knit-wise, knit the next stitch, pass the slipped stitch over the knitted stitch
STS – stitches
Download & Print this Pattern
Do you enjoy working from a paper copy? Get the downloadable, printer-friendly PDF completely ad-free.
That way you can have lifetime access to it and download it to any device and view it from anywhere, without ads (and the pattern might not be around forever).
Save it for Later
- Buy the ad-free, printer-friendly pattern in the Brome Fields Shop.
- Save it to your Ravelry Library!
- Pin-it to Pinterest for later here.
Sock Pattern Instructions, Toe-Up
 |
 |
 |
Toe Up Pattern, Knit in the Round, Magic Loop Method:
CO 12 STS, split 6 STS on each needle, PM, join in the round.
Round 1: *K*
Round 2: *K1, INC1, K4, INC1, K1* (increase 4 STS) 12+4=16
Round 3: *K1, INC1, K6, INC1, K1* (increase 4 STS) 16+4=20
Round 4: *K1, INC1, K8, INC1, K1* (increase 4 STS) 20+4=24
Round 5: *K1, INC1, K10, INC1, K1* (increase 4 STS) 20+4=28
At this point you should have 14 STS on each needle.
Flip it inside out and seam up the toe. It’s easier to do now, rather than wait until you’re finished.
Rounds 6+: Knit all stitches, until it measures 22″ (56cm) or desired length.
Last 4 rounds: *K2, P2*
BO loosely in the *K2, P2* pattern.
Weave in the ends.
Block, if desired.
To complete your pair of socks, just knit the second the same as the first.
Sock Pattern Instructions, Top-down
Top Down Pattern, Knit in the Round, Magic Loop Method:
CO 28 STS, split 14 STS per needle, PM, join in the round.
Rounds 1-5: *K2, P2*
Rounds 6+: Knit all stitches, until it measures 22″ (56cm) or desired length.
Decrease for toe:
Round 1: *SKP, K10, K2TOG*
Round 2: *SKP, K8, K2TOG*
Round 3: *SKP, K6, K2TOG*
I stopped here because I have wide feet and I like to have some wiggle room for my toes, but if you’d like your socks a little narrower, you may want to decrease one more round.
Round 4: *SKP, K4, K2TOG* (optional)
How do you want to end the toe?
Option 1: Whip Stitch or Mattress Stitch
This seam creates a little bit of bulk.
BO in all knit stitches, turn the sock inside out and then seam the toe closed using a whip stitch or mattress stitch.
Option 2: Kitchener Stitch
Create an invisible seam, without the bulk.
Make sure you have the same number of stitches on each needle.
With an 8-10″ tail, thread your darning needle.
Tip: Make sure your yarn is always below your needles.
Kitchener Stitch Video Tutorial
Step-by-Step Kitchener Stitch Instructions
Step 1:
Go through the left side of the front stitch, as if to knit, slide it off the working needle onto your darning needle.
Go through the right side of the front stitch, as if to purl and then pull the yarn through leaving the 2nd stitch on the working needle, pull the yarn tight.
Step 2:
Go through the right side of the back stitch, as if to purl, slide it off the working needle onto your darning needle.
Go through the left side of the back stitch, as if to knit and then pull the yarn through leaving the 2nd stitch on the working needle, pull the yarn tight.
Repeat steps 1-2 until you have 1 stitch remaining on each needle. Remover your working needles. Pull the yarn tight, push the yarn inside, turn the sock inside out and weave in the ends.
More free patterns for tube sock that you’ll love

|
|
|
|