Herringbone Knit Plant Pot
This post may contain affiliate links. Please read my disclosure policy.
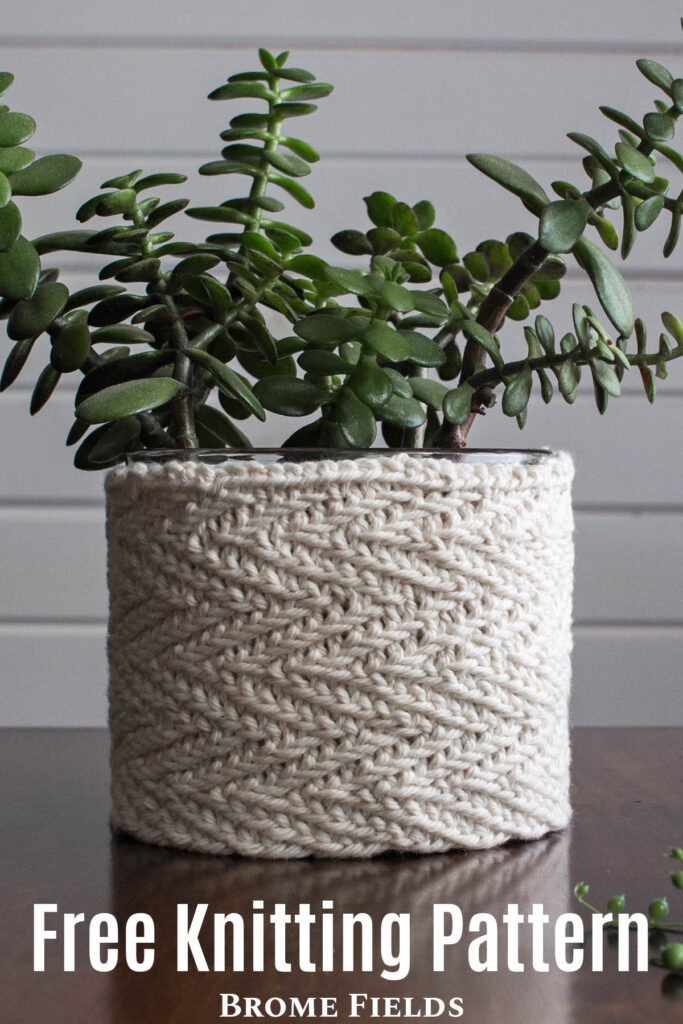
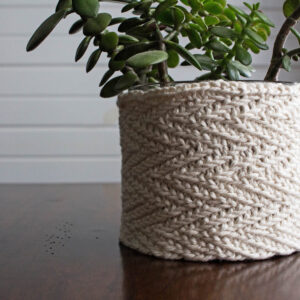
This herringbone knit plant pot cover is a rewarding project that adds a personal touch to your cozy home decor.
If you’re not familiar with this stitch you can learn how-to knit the herringbone stitch in the round in the video tutorial below.
About the Pattern
Available Sizes: One
Size: Fits a 5” (13cm) Diameter Container
Pattern Format: Written Pattern, No Chart
Skill Level: Advanced Beginner
PDF Format: Printer Friendly
Bonus: Video, Checklist
Techniques
Here are some of the knitting skills you need to know before getting started:
Knit in the Round
Knit & Purl Stitches
Herringbone Stitch
Yarn & Substitutions
Yarn Weight: Worsted
Yardage: 60 – 70 yards (55 – 64 meters)
Suggested Yarn: Knit Picks Simply Cotton Organic Worsted Yarn
Needles & Notions
Needle Size: US 9 (5.5mm) Circular Needles with a 16” (41cm) Cable
Extras: Stitch Marker
Gauge
21 STS & 46 rounds per 4” (10cm) square, knit in the pattern below
Details
Measurements: 4″ x 8″ wide (10cm x 20cm)
Gauge: 21 STS & 46 rounds per 4” (10cm) square, knit in the pattern below
Weight: 1.5oz (40g)
Notes
Not reversible.
Knit bottom up.
Fits a 5” (13cm) diameter container.
CO edge is the width/circumference.
Knit using the herringbone knit stitch.
Knit in the round with a circular needle.
When knitting in the round you’re always knitting the right side of your work.
Video Tutorial
Knitting Abbreviations
*– * – repeat between * to end of round
BO – bind-off in pattern
CO – cast-on (long-tail cast-on method)
K – knit stitches (K1 means to knit 1 stitch)
LH – left hand
P – purl stitches (P2 means to purl 2 stitches)
PM – place marker
RH – right hand
S1PW – slip one stitch purl-wise
SM – stitch marker
ST – stitch
STS – stitches
WYIF – with yarn in front
Save it for Later
- Buy the ad-free, printer-friendly pattern in The Shop.
- Save it to your Ravelry Library!
- Pin-it to Pinterest for later!
Save this pattern for later!
Download & Print this Pattern
Do you enjoy working from a paper copy? Get the downloadable, printer-friendly PDF completely ad-free.
That way you can have lifetime access to it and download it to any device and view it from anywhere, without ads (and the pattern might not be around forever).

Pattern Instructions
 |
 |
 |
CO 80 STS, PM, join in the round
Rounds 1-8: *K2, WYIF slip 2* remove SM, slip 1 ST from LH needle to the RH needle, replace SM
Rounds 9, 11, 13, 15: *WYIF slip 2, K2* remove SM, slip 1 ST from LH needle to the RH needle, replace the SM
Rounds 10, 12, 14, 16: Repeat round 1
Repeat rounds 1-16 1 more time (or until desired height)
Rounds 33-40: Repeat round 1
Rounds 41, 43, 45: Repeat round 9
Rounds 42, 44: Repeat round 1
Round 46: BO tightly in all knit STS
Knitting Notes:
Technically this pattern only has 2 different rows, so don’t be scared it’s a pretty easy pattern.
To make it larger or smaller CO in multiples of 4.
I CO tightly using the long tail CO method.
I knit this a little on the tight side, I usually knit a little on the loose side.
I slipped the 2 stitches at once to create a tighter stitch.
A mistake I frequently made was knitting 2 together when I was supposed to be slipping 2 STS. :(
This is an unforgiving stitch. When you make a mistake, it’s noticeable and the only way to fix it is to tink back or frog. :( Don’t despair! It’s sooo pretty when it’s finished! It’s worth it! :)
More Cozy Knitting Patterns you’ll love…
|
|
|
|