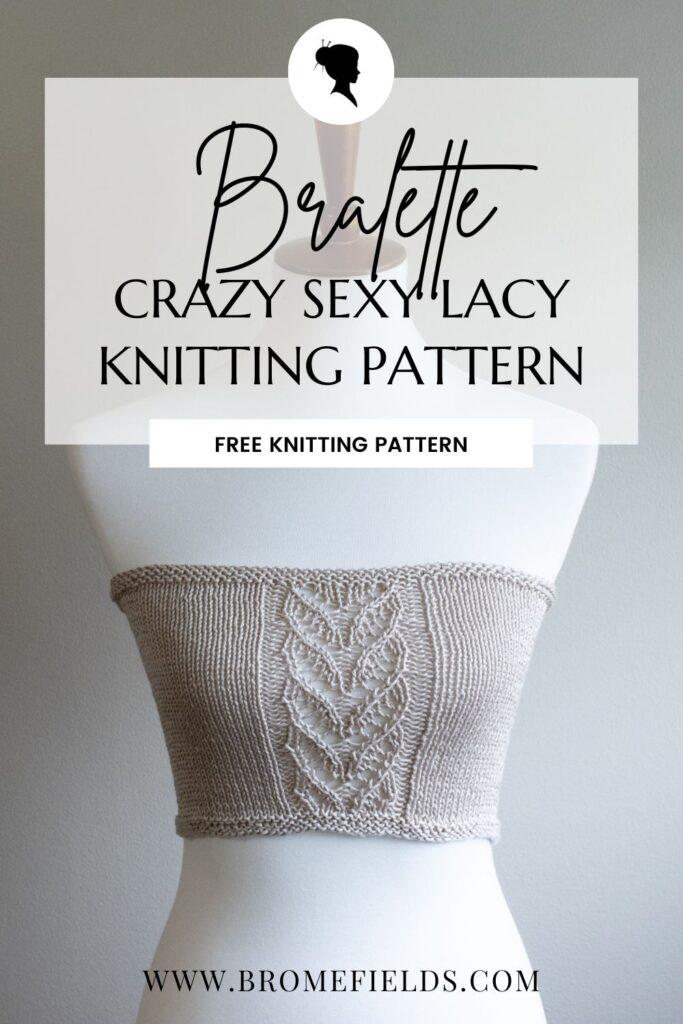
Knitted Bralette Crop Top Pattern, Free
This post may contain affiliate links. Please read my disclosure policy.
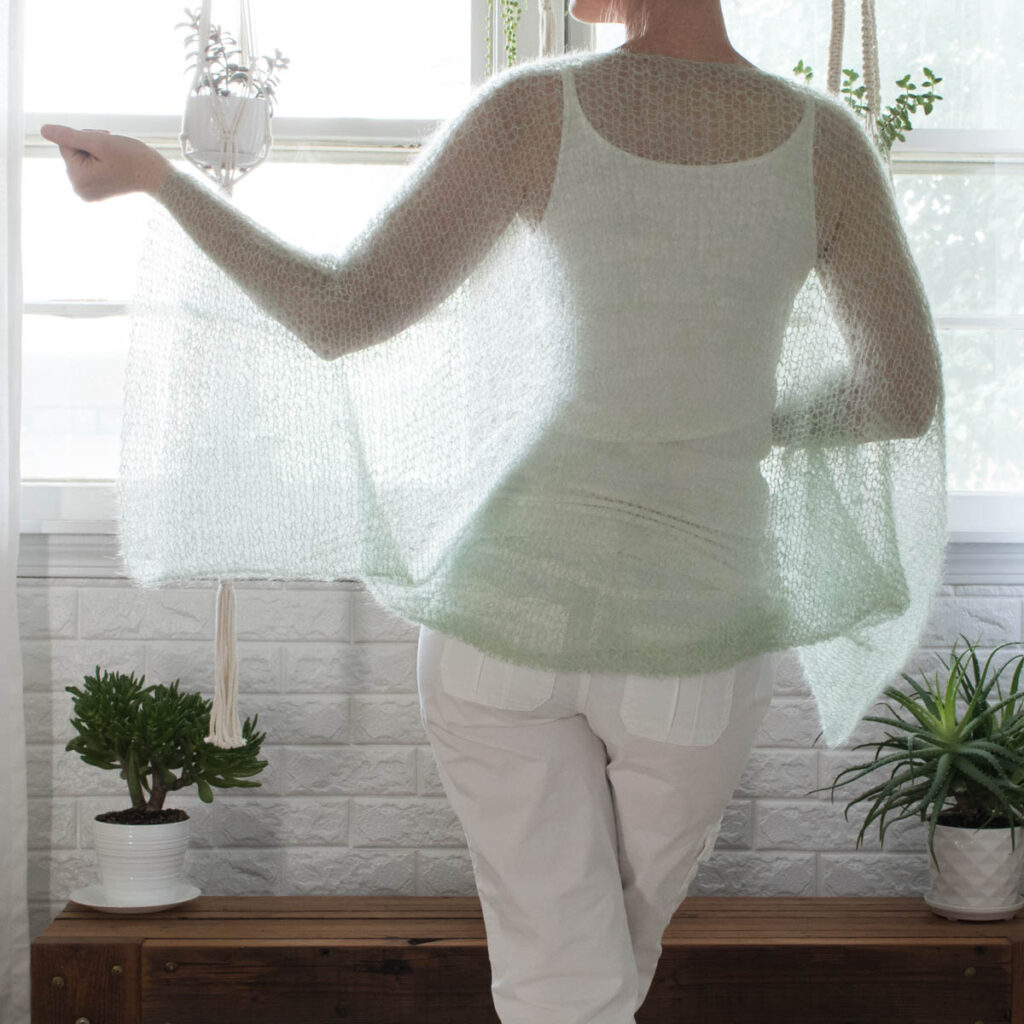
Ready to add a handmade touch to your summer wardrobe? This knitted bralette crop top pattern is light, breathable, and effortlessly stylish—perfect for layering or wearing on its own. I designed it when I wanted something easy to knit that felt wearable and fresh, even on the hottest days. Whether you’re lounging in the sun or styling it under your favorite button-up, this elegant lace knit top brings cozy comfort to warm-weather days—and it works up surprisingly fast.
This knitted bralette crop top pattern has elegant cable & lace knit stitches. It’s a must have sexy summer top to add to your knitted loungewear collection.
Looking for something specific? Use this Table of Contents to jump straight to the section you need!
All About The Bralette Pattern
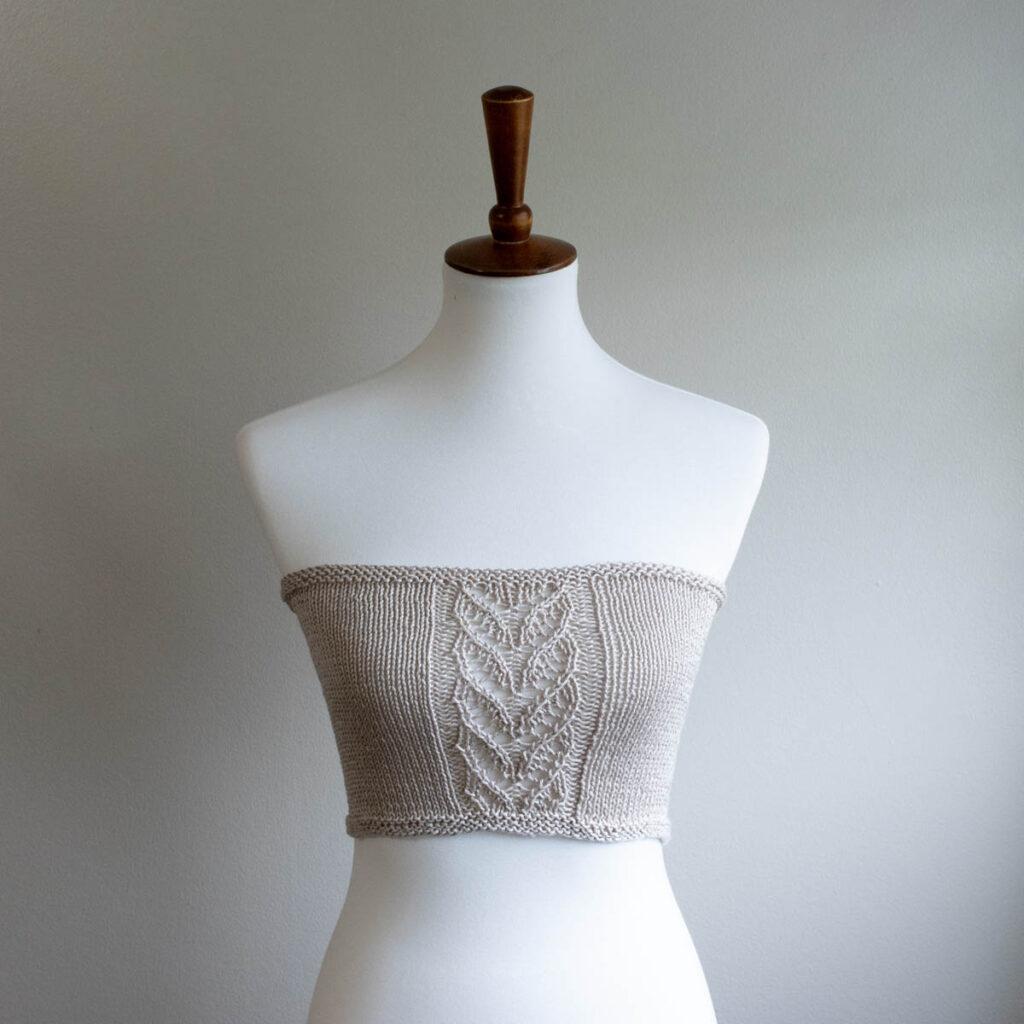
It’s the perfect summer bralette knitting pattern made with luxurious pima cotton yarn! A silky soft & comfortable crop tank top without straps. However, you can design your own. (The best part about knitting is that you get to make it your style. You do you!)
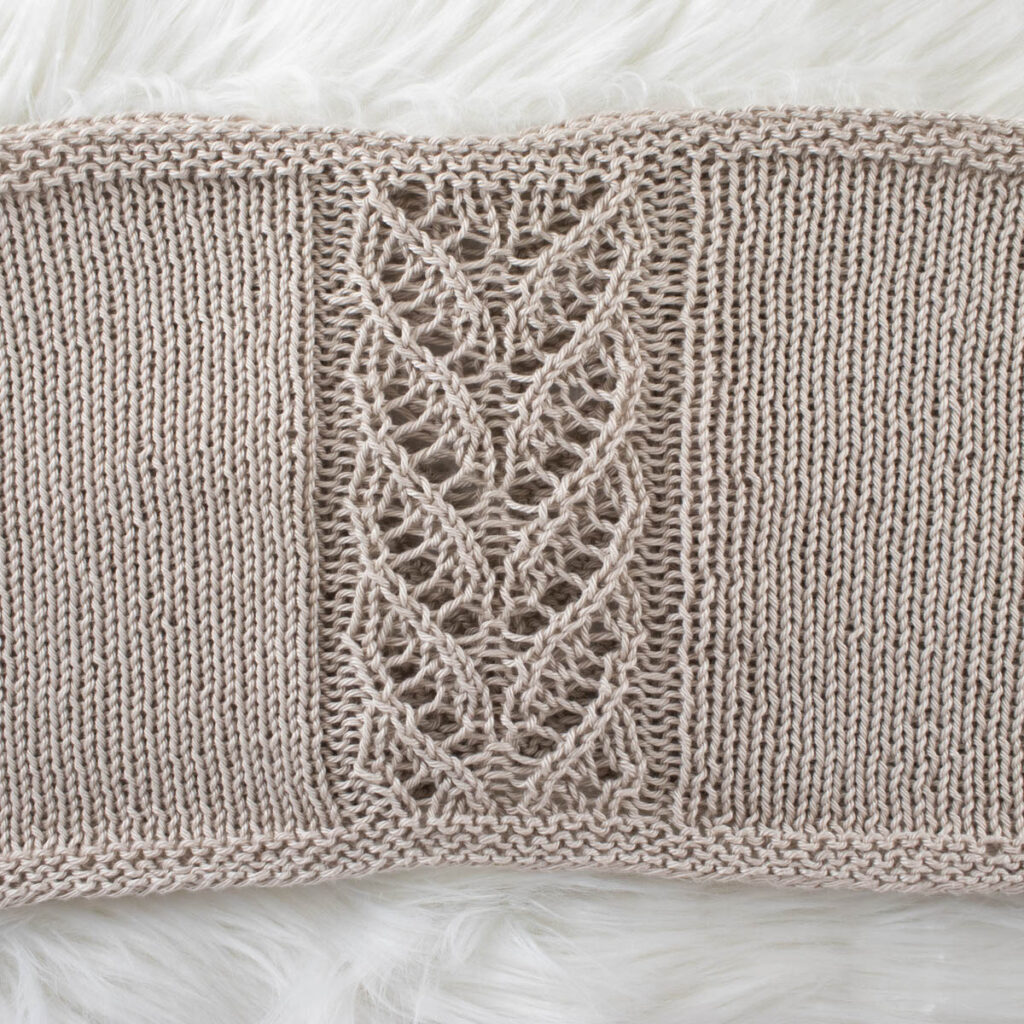
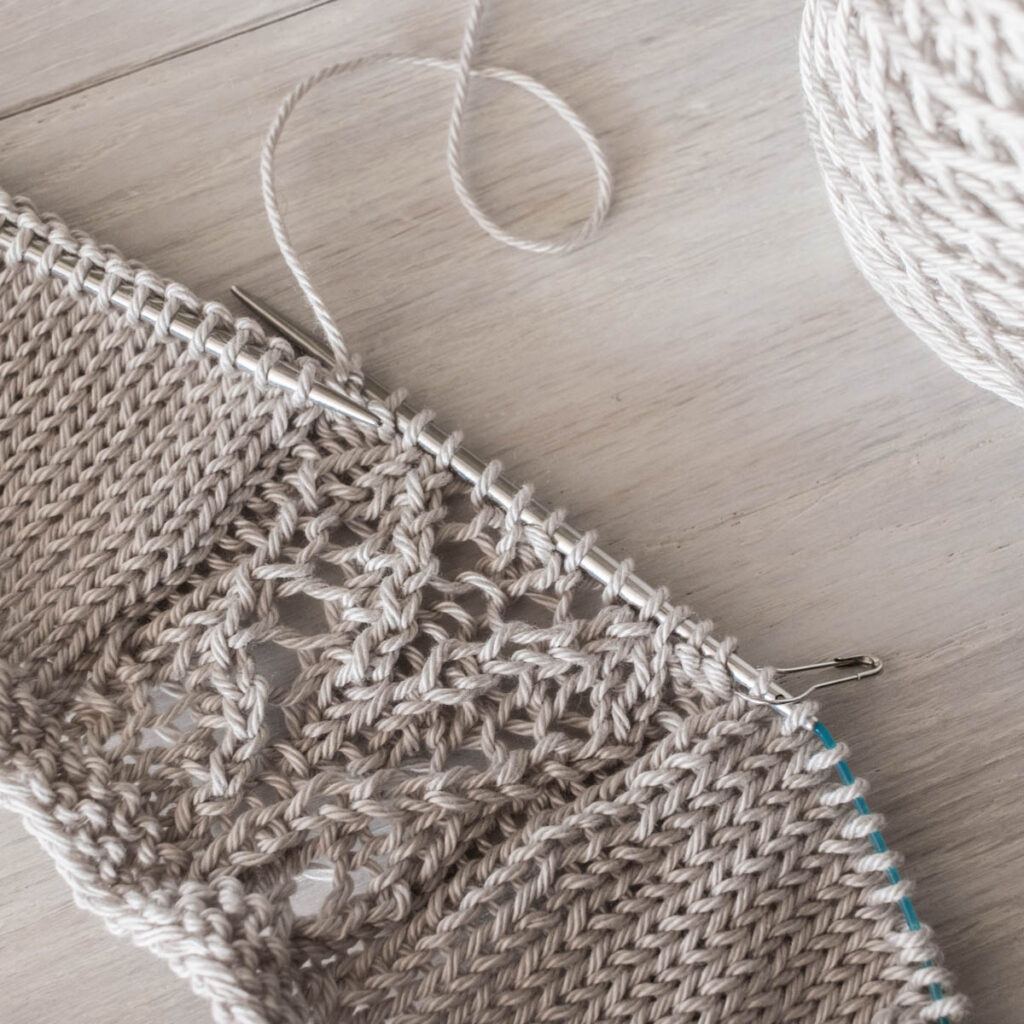
This knitted bralette is constructed from the bottom up in one piece. You can add straps later, if desired. It features a cable & lace panel on the front and back with stockinette stitch in between, making this really easy to adjust for any size.
I usually design simple beginner knitting patterns, but this time I wanted to give you something with a little bit of detail in between the simple stitches to introduce you (and me) to lace knitting. We’re on this journey together, right?!
This knitted bralette would be perfect for wearing with cardigans or peeking or peeking out under a low cut sweater this fall.
Available Sizes: 19 (28″- 64″ Bust)
Pattern Format: Written Pattern, No Chart
Pattern Language: English
Skill Level: Advanced Beginner
PDF Format: Printer Friendly
Bonus: Video
Pattern Name: Misty Moonlight
Materials Used
Yarn Weight: DK Weight Yarn
Yardage: 91 – 429 yards (84 – 393 meters)
Suggested Yarn: Cascade Yarns Ultra Pima, Buff
Needle Size: US 7 (4.5mm) Circular Needles with a 16” (40cm) Cable or 24″ (60cm) Cable, depending on size
Extras: Stitch Marker
Substitute Yarn Options
Cascade Yarns Noble Cotton Yarn
Lion Brand 24/7 DK Cotton Yarn
Lion Brand Cotton Bamboo Yarn
Details
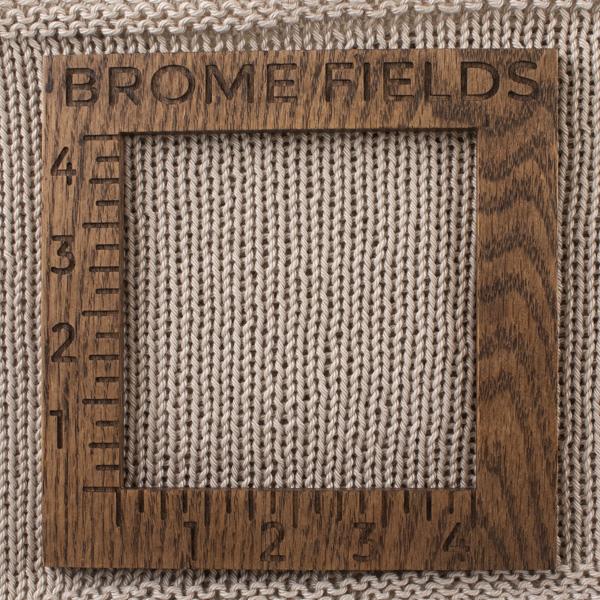
Gauge: 15.5 STS & 30 rounds per 4” (10cm) square, knit in stockinette stitch.
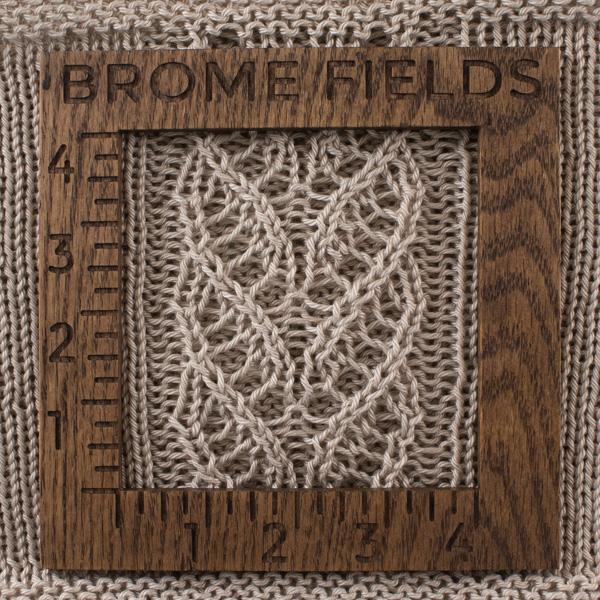
Photo Details
Dress form bust: 36″ (91cm)
# of CO stitches: 120
Measurements, after blocking: 14″ wide x 8″ (35.5cm x 20cm)
Weight: 2.6oz (75g)
Size Chart
2-3” / 5-7.5cm of negative ease.
| Bust | CO STS | Height | Grams | Yards | Meters |
| 30″ / 76cm | 98 | 6″ / 16cm | 44-54 | 91-101 | 84-93 |
| 32″ / 81cm | 106 | 6″ / 16cm | 48-58 | 100-110 | 92-101 |
| 34″ / 86cm | 114 | 8″ / 20cm | 66-76 | 136-146 | 125-134 |
| 36″ / 91cm | 120 | 8″ / 20cm | 70-80 | 145-155 | 133-142 |
| 38″ / 97cm | 128 | 8″ / 20cm | 74-84 | 154-164 | 140-150 |
| 40″ / 102cm | 136 | 8″ / 20cm | 78-88 | 162-172 | 148-158 |
| 42″ / 107cm | 144 | 10″ / 25cm | 100-110 | 207-217 | 189-199 |
| 44″ / 112cm | 150 | 10″ / 25cm | 104-114 | 216-226 | 197-206 |
| 46″ / 117cm | 158 | 10″ / 25cm | 108-118 | 224-234 | 205-214 |
| 48″ / 122cm | 166 | 10″ / 25cm | 113-123 | 233-243 | 213-222 |
| 50″ / 127cm | 174 | 12″ / 30cm | 134-144 | 278-288 | 254-263 |
| 52″ / 132cm | 180 | 12″ / 30cm | 138-148 | 287-297 | 262-271 |
| 54″ / 137cm | 188 | 12″ / 30cm | 143-153 | 295-305 | 270-279 |
| 56″ / 142cm | 196 | 12″ / 30cm | 147-157 | 304-314 | 278-287 |
| 58″ / 147cm | 204 | 14″ / 35cm | 168-178 | 349-359 | 319-328 |
| 60″ / 152cm | 210 | 14″ / 35cm | 173-183 | 357-367 | 327-336 |
| 62″ / 157cm | 218 | 14″ / 35cm | 177-187 | 366-376 | 335-344 |
| 64″ / 162cm | 226 | 14″ / 35cm | 181-191 | 375-385 | 343-352 |
| 66″ / 162cm | 234 | 16″ / 41cm | 203-213 | 419-429 | 384-393 |
Tips, Tricks & Techniques
All rows have the same number of increases & decreases, so you’ll always have the same number of stitches at the beginning and end of every row.
This knitted bralette is worked in the round, circularly, from the bottom up, in one piece, so you don’t have any seams. :)
The straps can be worn in a variety of ways. You do you!
I noticed that my left leaning stitches are tighter than my right leaning stitches, so in the future I need to loosen my right leaning stitches, so that they’re more even.
I started out using 2 stitch markers, one before each lace panel, but then I noticed that I had started a new round in the middle of the round *insert eye roll* on multiple occasions, so I decided not to use the 2nd stitch marker, just the one that marked the beginning of the round, which corrected my problem and it’s easy to tell when the 2nd panel starts (with 2 reverse stockinette stitches), so I don’t really *need* the 2nd stitch marker. I hope I saved you some heartache.
I noticed that with this yarn (100% cotton) once it stretches out, it stays stretched out. I’d like to reknit this with a cotton nylon blend or something else that has some stretch to it.
The knitted bralette doesn’t “bounce back” into shape, so the first version I made was way too big. The 2nd time I cast-on 20 stitches fewer and it looked a little small and I was worried that it wouldn’t fit, but once I steamed it and put it on, it was perfect!
Techniques
Knit in the Round OR Knit Flat
Knit & Purl Stitches
Increase Stitches
Decrease Stitches
Yarn Overs
How to Knit the Lace Stitch Video
Download & Print this Pattern
Do you enjoy working from a paper copy? Get the downloadable, printer-friendly PDF completely ad-free.
That way you can have lifetime access to it and download it to any device and view it from anywhere, without ads (and the pattern might not be around forever).
Save it for Later
- Buy the ad-free, printer-friendly pattern in the Brome Fields Shop.
- Save it to your Ravelry Library!
Ways to Use This Pattern
Looking to get the most out of your new favorite summer knit? Here are some creative ways to customize, style and repurpose your bralette crop top:
- Style it solo: Pair it with high-waisted shorts or a flowy skirt for an easy, breezy warm-weather outfit.
- Layer it up: Wear it under a lightweight cardigan, kimono or linen button-up for a relaxed, layered look.
- Turn it into loungewear: Knit it in an ultra-soft cotton or bamboo yarn for a cozy bralette to wear at home or to bed.
- Make it a swimsuit cover: Throw it over your bikini or one-piece for a quick and comfy beach-to-boardwalk outfit.
- Create a matching set: Pair it with hand-knit shorts, a flowy knitted skirt or comfy wide-leg pants to complete the summer vibe.
- Use it as a base pattern: Modify the straps, add ribbing or lengthen it into a full tank top for a more personalized fit.
- Gift it handmade: It’s a thoughtful and quick project—perfect for birthdays, bridal showers or a handmade summer surprise.
Pattern, Knit in the Round
CO the number of STS from the chart above, PM, join in the round
Top Border (garter stitch):
Rounds 1, 3, 5: *P*
Rounds 2, 4, 6: *K*
Fill in the Blank Chart:
| CO STS | 98 | 106 | 114 | 120 | 128 | 136 | 144 | 150 | 158 | 166 | 174 | 180 | 188 | 196 | 204 | 210 | 218 | 226 | 234 |
| Half STS | 36 | 40 | 44 | 47 | 51 | 55 | 59 | 62 | 66 | 70 | 74 | 77 | 81 | 85 | 89 | 92 | 96 | 100 | 104 |
This chart tells you how many stitches to use to fill in the blank below. Find the number of stitches you used to cast-on, use the number below that to fill in the blank in the pattern below. That’s how many stitches you’ll knit until your next repeat.
So, if you CO 144 STS, fill in the blank with 59, so you’ll knit 59 stitches in between your panels.
Example:
Row 1: *P2, K4, P1, K4, P2, K59, PM*
Body:
Round 1: *P2, K4, P1, K4, P2, knit_________, PM*
Round 2: *P2, K1, YO, K1, K2TOG, P1, SKPO, K1, YO, K1, P2, knit_________, SM*
Round 3: *P2, K4, P1, K4, P2, knit_________, SM*
Round 4: *P2, K1, YO, K1, K2TOG, P1, SKPO, K1, YO, K1, P2, knit_________*
Round 5: *P2, K4, P1, K4, P2, knit_________, SM*
Round 6: *P2, K2, K2TOG, YO, P1, YO, SKPO, K2, P2, knit_________, SM*
Round 7: *P2, K4, P1, K4, P2, knit_________, SM*
Round 8: *P2, K1, K2TOG, YO, K1, P1, K1, YO, SKPO, K1, P2, knit_________, SM*
Round 9: *P2, K4, P1, K4, P2, knit_________, SM*
Round 10: *P2, K2TOG, YO, K2, P1, K2, YO, SKPO, P2, knit_________, SM*
Repeat rounds 1-10 until desired length. See size chart above for recommendations. At 5’9″ (175cm) height, 130lbs (59kg) weight, 35″ (88cm) bust, I made mine 8″ long.
Before starting the bottom border, repeat round 1.
Bottom border (garter stitch):
Rounds 1, 3, 5: *P*
Roundz 2, 4: *K*
Round 6: BO in all knit STS
Save this pattern for later!
Pattern, Knit Flat
Row 1 = Wrong Side
CO the number of STS from the Size Chart above
Top Border (garter stitch):
Row 1-6: *K*
Fill in the Blank Chart:
| CO STS | 98 | 106 | 114 | 120 | 128 | 136 | 144 | 150 | 158 | 166 | 174 | 180 | 188 | 196 | 204 | 210 | 218 | 226 | 234 |
| Half STS | 36 | 40 | 44 | 47 | 51 | 55 | 59 | 62 | 66 | 70 | 74 | 77 | 81 | 85 | 89 | 92 | 96 | 100 | 104 |
This chart tells you how many stitches to use to fill in the blank below. Find the number of stitches you used to cast-on, use the number below that to fill in the blank in the pattern below. That’s how many stitches you’ll knit until your next repeat.
So, if you CO 144 STS, fill in the blank with 59, so you’ll knit 59 stitches in between your panels.
Example:
Row 1: *P2, K4, P1, K4, P2, K59, PM*
Body:
Row 1 (WS): *K2, P4, K1, P4, K2, purl_________*
Row 2 (RS): *knit_________, P2, K1, YO, K1, K2TOG, P1, SKPO, K1, YO, K1, P2*
Row 3 (WS): *K2, P4, K1, P4, K2, purl_________*
Row 4 (RS): *knit_________, P2, K1, YO, K1, K2TOG, P1, SKPO, K1, YO, K1, P2*
Row 5 (WS): *K2, P4, K1, P4, K2, purl_________*
Row 6 (RS): *knit_________, P2, K2, K2TOG, YO, P1, YO, SKPO, K2, P2*
Row 7 (WS): *K2, P4, K1, P4, K2, purl_________*
Row 8 (RS): *knit_________, P2, K1, K2TOG, YO, K1, P1, K1, YO, SKPO, K1, P2*
Row 9 (WS): *K2, P4, K1, P4, K2, purl_________*
Row 10 (RS): *knit_________, P2, K2TOG, YO, K2, P1, K2, YO, SKPO, P2*
Repeat rows 1-10, until desired length.
For recommended lengths see the size chart above. At 5’9″ (175cm) height, 130lbs (59kg) weight, 35″ (88cm) bust, I made mine 8″ long.
Before starting the bottom border, repeat row 1.
Bottom border (garter stitch):
Row 1-5: *K*
Row 6: BO in all Knit STS
Seam the edges together. A vertical mattress seam stitch will look seamless.
Weave in the ends.
Steam-block lightly for best result, optional.
Knitting Abbreviations
* – * – repeat between asterisks
BO – bind-off in pattern
CO – cast-on (long-tail cast-on method)
K2TOG – knit 2 stitches together
K – knit stitches (K1 means to knit 1 stitch)
P – purl stitches (P2 means to purl 2 stitches)
SKPO – slip 1 stitch knit-wise, knit the next stitch, pass the slipped stitch over the knitted stitch
STS – stitches
YO – yarn over
Lace & Stockinette Stitch Gauge Pics
The Hardest Part…
It took me about a month to figure out what type of straps I wanted to create for this bra top. Hopefully, I can save you some time & trouble. ;)
I started off with procrastinating for about 3 weeks because I really didn’t want to knit an I-cord. But I had this cute top staring at me on my dress form, mocking me really, everyday when I went into my craft room. I’m pretty sure it was telling me “Hurry up and finish me so you can wear me. You know you want to!”
What Style of Straps?
I had a hard time deciding on the style of straps knitted bralette. Do I want two straps? Do I want them to crisscross? Do I want just one strap that goes around my neck and meets at the top center point in the front only and it drapes in the back? So. many. options. Now it’s time for you to decide. Lol! Good luck with that. ;)
I started knitting a 4-stitch I-cord straps using size 5 needles and knit about 4″ and thought that it was too thick. This is a dainty knitted bralette, it should have dainty straps. So, I switched to size 3 needles & cast-on 3 stitches. This is looking pretty good, but after about 8″ I thought this is going to take forever. Lol.
So, I set that one aside and I decided to try crocheting a chain with a size 3.5mm needle to see what I thought of that. I think it’s the perfect amount of dainty for this delicate lacy knit top! However, for more support, I recommend going with the 3 stitch I-cord using size 3 needles.
Disclaimer… I’m not a crocheter. I’ve tried a few times, mostly when I was a little kid and didn’t have much luck making a “square” pot holder… it just didn’t click with me and I’m okay with that… for now.
So, I crocheted a chain stitch, which, to me, looks like a pretty row of chevron knit stitches. :) Ah, the knitter in me.
This is going to be clumsy. I held my yarn wrapped around my index finger twice to keep some tension (this probably isn’t “normal” or necessary, but it’s what I had to do to keep my stitches a little tight) and I have my middle finger pressed lightly to it too.
I pinched the chain with my thumb to my ring finger to help keep tension on the stitches and I move up every 4 or 5 stitches or so. I don’t like to move too much because I feel like I’m just getting into a flow and then have to readjust, but I want to keep my tension steady throughout the entire chain. Ugh.
Just so y’all know… I’m not quitting my day job. Lol.
I couldn’t do the whole chain all at once because my hand cramped a couple of times, so I had to take a break. Hm… maybe I should’ve stuck with the 3-stitch I-cord. lol!
I envy all of you crocheters!
Make the Most of This Pattern
This free knitting pattern pops up in several of my Pinterest boards — and for good reason! It’s flexible, functional and fun to knit. Here’s how it fits into a few different themes:
Capsule Wardrobe
This knitted bralette crop top is a perfect addition to your handmade capsule wardrobe. Lightweight, breathable and endlessly versatile—it’s designed to be worn solo or layered all season long.
Lace Knitting Patterns
Soft lace details give this knit bralette a delicate touch. This free pattern is both stylish and functional, offering light support and layering potential with a handmade twist.
One Skein Knitting Patterns
Make the most of your yarn with this one-skein knitted bralette pattern! It’s a fast, wearable project that’s ideal for stash-busting and summer layering.
Summer Knitting Patterns
Beat the heat in style with this summer bralette knitting pattern. Made with breathable yarn and an open design, it’s perfect for hot days, layering, or lounging.
Slow Fashion Knitting Patterns
This knit bralette is more than a summer top—it’s a slow fashion staple. Make it by hand, wear it often, and feel good about every stitch. Sustainable, stylish, and made to last.
FAQ
Q: Can I make the knitted bralette longer?
A: Very easily, just knit more rows until it’s the size that you want. :) Keep in mind that if you’re knitting it longer than the pattern suggests, you will need more yarn.
Q: How long do I make the straps?
A: This one you’re going to have to try on as you go. I recommend making them a little too long and then you can shorten them as needed. However, keep in mind that they’ll stretch a little because of the weight of the top and they’ll stretch over time too.
Care instructions
Gently hand wash in cold water with a wool soap or delicate detergent, be careful not to twist or wring it. Pat out the excess water with a clean towel (a kitchen linen towel works great), lay flat to dry on a towel. Hang drying will cause it to stretch out. I recommend lightly steam ironing it to even out the stitches. Do not have it dry cleaned, use bleach or fabric softener. If you’re using the pima cotton yarn, you can tumble dry it on low heat, but I recommend laying it flat to dry.
Expert tips
You can use plastic or wooden needles if you find that your stitches are too slippery. :)
If you tend to bind-off tightly like I do, you can BO with a larger needle size. It didn’t matter how loosely I tried to bind-off it just wasn’t as consistent or relaxed as using a larger needle.