Seed Stitch Knitted Pumpkin Pattern, Free
This post may contain affiliate links. Please read my disclosure policy.
It’s pumpkin knitting season! This seed stitch knitted pumpkin is super cute, easy to knit and a great left-over yarn project.
Knit pumpkins make the perfect transition to fall home decor project.

Perfect cozy knitted pumpkin decor!
Create the perfect textured pumpkin using the seed stitch. If you can knit and purl, you can easily knit this pumpkin. It’s knit in the round, so there’s no seaming.
Time is so precious and there’s only so much of it. Even though I want to knit a dozen pumpkins, I don’t have the time. So, I’m working on slowing down and embracing slow living. Meaning, if I only get one done this year, that’s okay.
I want to thoroughly enjoy the one that I knit. Enjoy choosing the yarn, the perfect pattern, using my favorite needles and simply being with my project.
Finding time in the quite of the early morning before the rest of the world wakes up to knit & sip on a hot cup of coffee.
Knit a new pumpkin every year, capturing time & creating memories. Every year you get to watch your pumpkin patch grow.
WHAT YOU’LL LOVE!
- It’s rustic farmhouse style
- All the texture.
- It’s eco-friendly.
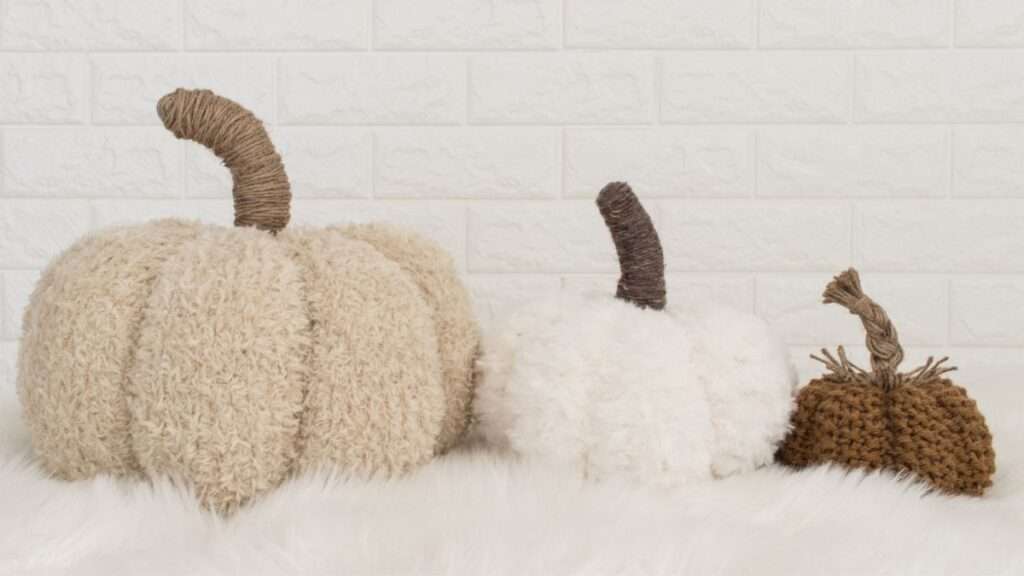
Maybe you’d like to have a large pumpkin {it’s huge really!}, maybe a vintage chenille pumpkin pattern to remind you of grandma or a fancy faux fur pumpkin that’s so soft and squeezable?! Whichever one you choose will be perfect! I love them all. ;)
About
Available Sizes: Three
Pattern Format: Written Pattern, No Chart
Pattern Language: English
Skill Level: Beginner
Bonus: Videos
Techniques
Knit in the Round
Knit & Purl Stitches
No Increases or Decreases
Stem Making
Materials
Yarn Weight: Bulky
Yardage: 43 – 138 yards {39 – 126 meters}
Suggested Yarn: Lion Brand Hue + Me
Needle Size {Knit Flat}: US 10.5 {6.5mm} Straight Needles
Needle Size {Knit in the Round}: US 10.5 {6.5mm} Circular Needles with a 16” {40cm} Cable
Darning / Tapestry Needle
Scissors
Sizes
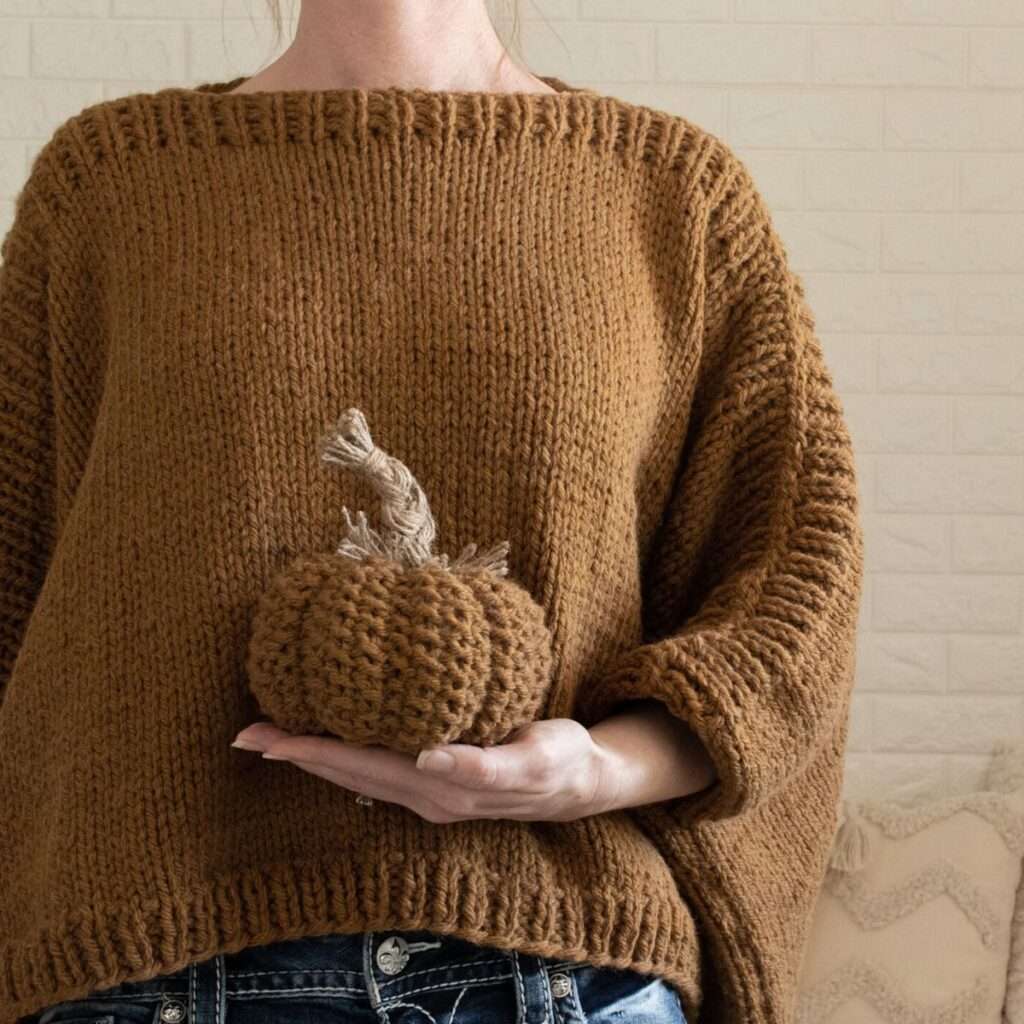
Small: 5″ W x 3″ {12cm x 8cm} 43-47 yards {39-43m} 1.4oz {40g} unstuffed {Pic}
Medium: 8″ W x 5″ {20cm x 12cm} 88-92 yards {80-84m}
Large: 11″ W x 7″ {28cm x 18cm} 133-138 yards {121-126m}
Gauge
Exact gauge is not required for this project.
Measurements of Small Pumpkin
Finished Pumpkin Measurements: 5 1/2″ wide x 3 1/2″ {14cm x 9cm} {pictured}
Finished Stem Measurements: 1″ wide x 4″ {2cm x 10cm} {pictured}
Notes
Reversible.
Knit bottom up.
Uses the seed stitch.
Knit in the round with a circular needle.
When knitting in the round you’re always knitting the right side of your work.
For the small pumpkin you’ll need a smaller cable to knit in the round or a longer cable to knit using the magic loop method.
Save it for Later
- Buy the ad-free, printer-friendly pattern in The Shop.
- Save it to your Ravelry Library!
- Pin-it to Pinterest for later.
Download & Print this Pattern
Do you enjoy working from a paper copy? Get the downloadable, printer-friendly PDF completely ad-free.
That way you can have lifetime access to it and download it to any device and view it from anywhere, without ads (and the pattern might not be around forever)
Pattern, Knit in the Round
 |
 |
 |
CO 35{S}, 65{M}, 95{L} STS, PM, join in the round
Round 1: *K1, P1* K1
Round 2: *P1, K1* P1
Repeat rounds 1-2 for about 6″{S}, 9″{M}, 12″{L}
Knit Flat Option: The cast-on numbers are the same as if you’re knitting in the round. Knit in stockinette, meaning knit the right side and purl the wrong side, to your desired length, seam the edges together and then follow the remainder of the instructions above.
Jump to the “How to Finish” Instructions.
Pattern, Knit Flat
CO 35{S}, 65{M}, 95{L} STS
Row 1 {WS}: *K1, P1* K1
Row 2 {RS}: *K1, P1* K1
Repeat rows 1-2 for about 6″ {S}, 9″ {M}, 12″ {L}
Seam the edges together.
Save this pattern for later!
Cinch the Bottom Closed
With a long tail thread your darning needle and pick-up every outside stitch of the cast-on edge.
Cinch it as you go. Whip stitch it across the hole to reinforce it {optional}.
Push the tail into the center, tie a knot and leave the tail inside, you don’t have to weave in the ends.
If you have a long tail, like I did in the video, you can push the tail back out to use to create the ribs.
Video Tutorial: Cinch Bottom Closed:
Cinch the Top Closed {Part 1}:
Without binding-off, cut/break your tail. Leaving a long tail, mine is a couple of feet long, probably too long, but I can use it to create some ribs too.
Thread your darning needle and slip all the stitches off your working needles onto the thread. Stuff it before you cinch it closed.
Video Tutorial : Cinch Top Closed:
Add Stuffing:
Start by adding the stuffing to the outside edge and then fill in the center to your desired density.
Video Tutorial : Add Stuffing:
Cinch the Top Closed {Part 2}:
Now you’re ready to cinch the top closed. If you have a delicate yarn that might break, you’ll want to take extra care with this step and cinch a little at a time working your way around all the stitches.
I recommend going around a second time to reinforce it. Keeping it cinched tightly, tie a knot and push the end into the inside of the pumpkin. If you have a long enough tail, use it to make a rib or 2.
Make the Ribs:
Starting at the top center, if you’re starting with a new thread wrap it around the top edge and tie a knot in it, thread it through a column of seed stitches to the bottom, cinch it and tie a knot to anchor it.
Weave in the ends, or push them into the center of your pumpkin.
No blocking necessary. :)
Stem Materials
Twine
7″ of Heavy Wire
Cutting Board + Clamp {something or someone to hold your twine while you braid it.}
Sharp Scissors
7″ Book/Board/Cell Phone {something to measure & wrap your twine around}
Video Tutorial : How to Braid the Pumpkin Stem
Stem Instructions
Wrap the twine around your 7″ item 15 times, so you have 30 strands. Carefully remove the strands, leaving it folded.
Cut a 6″ piece of twine from the ball and wrap it around the top of your strands, about 1″ from the top, 5 times tightly, tie it in a knot in the back.
Clamp the twine to the cutting board by the top, above the knot.
Cut the bottom, so it doesn’t loop. Separate it into 3 sections of 10.
Braid it about 5 times. Cut a 6″ piece of twine from the ball and wrap it around the bottom of your braid, about 1 1/2-2″ from the bottom, 5 times tightly, tie it in a knot in the back.
Push the top wrap down towards the braids.
Trim the top, so it’s about 1″ long.
Push the bottom up towards the braids.
Trim the bottom, if desired.
Trim/hide the knot ends.
Using the heavy wire, weave it into the braid, push it into the pumpkin and bend it, as desired.
Abbreviations
* – * – repeat between *
CO – cast-on {long-tail cast-on method}
K – knit stitches {K1 means to knit 1 stitch}
P – purl stitches {P2 means to purl 2 stitches}
PM – place marker {optional}
STS – stitches
|
|
|
|
This knit pumpkin pattern is sure to add some rustic to your farmhouse style!