Textured Cable Knitting Stitch Pattern
This post may contain affiliate links. Please read my disclosure policy.
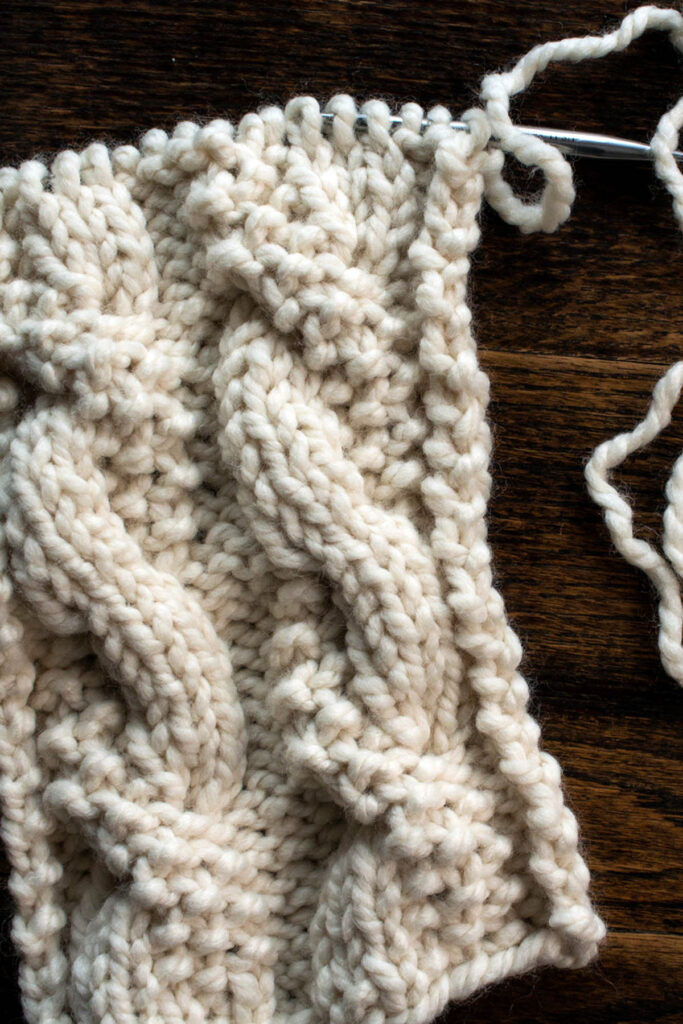
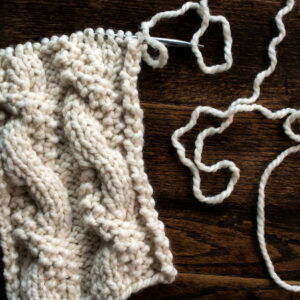
Use this beautiful & unique Textured Cable Knitting Stitch in your next cable stitch project.
Picture of the Pattern:
About the Stitch
The Textured Cable Knitting Stitch is an 18 row repeat, consisting of 2 simple cables which are only used on 2 of the 8 rows.
This textured cable stitch is for advanced beginner knitter. This stitch is much easier once you’ve mastered the knit & purl stitch and you can tell the different from the front and back of your work.
If you’re knitting a stockinette stitch scarf or blanket and you’d like to add this cable pattern, having a few reverse stockinette stiches on either side of your cable will give it more definition, so it “pops.”
This is an alternating cable, so the cable is half seed stitch and half stockinette stitch and then after the cable it switches to half stockinette stitch and half seed stitch.
Even though this cable stitch requires your full attention, it’s easier than it looks! Once you watch the video, knit a couple of repeats, you’ll be able to read your project instead of the pattern. However, I highly recommend practicing this stitch on a scarf or headband pattern before tackling a blanket or sweater. :) I mean… knitting blankets with this stitch on repeat. 😍
A texture stitch that gives you all the texture of the beloved seed stitch plus the classic cable stitch all in one!
This is not a reversible pattern, meaning that the front and back are not the same.
There aren’t any increases or decreases, so you should always have the same number of stitches on the needles.
Skill level: Intermediate / Advanced Beginner
Yarn, Needles & Notions
Yarn Weight: Super Bulky
Yardage: 35-45 yards (32 – 41 meters)
Suggested Yarn: Lion Brand Wool Ease Thick & Quick
Needle Size: US 11 (8mm) Knitting Needles
Cable Needle
Darning Needle / Tapestry Needle / Yarn Needle
Scissors
Stitch Markers (optional)
Note: I like using cable needles for a small swatch, it’s easier on my hands than full length straight needles.
Yarn Substitutions
You can use any category of yarn you’d like. To get nice tension, start with the recommended needle size. If you’re stitches are too loose, use smaller needles and if you’re stitches are too tight use larger needles.
Video Tutorial
Music by Ben Sound
*Check out some of my other Cable Knit Stitches.
Textured Cable Stitch Swatch Instructions
Knit flat using straight needles:
CO in multiples of 9 stitches, plus 3
CO 21 STS
Row 1 = Right Side/Front
Row 1, 3, 5, 7: *P3 (K1, P1, K1, K3)* P3
Row 2, 4, 6, 8: *K3 (P3, K1, P1, K1)* K3
Row 9: *P3 (C6FKPK, K3)* P3 (cable row)
Row 10, 12, 14, 16, 18: *K3 (K1, P1, K1, P3)* K3
Row 11, 13, 15, 17: *P3 (K3, K1, P1, K1)* P3
Row 19: *P3 (KPKC6F, K3)* P3 (cable row)
Repeat rows 2-19 until desired length.
Expert tip: Place a stitch marker after the first 2 stitches and before the last 2 stitches to separate the garter stitch border stitches from the brioche cable stitches.
Checklist
Knit flat using straight needles:
CO in multiples of 9 stitches, plus 3
CO 21 STS
Row 1 (RS): *P3 (K1, P1, K1; K3)* P3
Start Repeat:
Row 2 (WS): *K3 (P3, K1, P1, K1)* K3
Row 3 (RS): *P3 (K1, P1, K1, K3)* P3
Row 4 (WS): *K3 (P3, K1, P1, K1)* K3
Row 5 (RS): *P3 (K1, P1, K1, K3)* P3
Row 6 (WS): *K3 (P3, K1, P1, K1)* K3
Row 7 (RS): *P3 (K1, P1, K1, K3)* P3
Row 8 (WS): *K3 (P3, K1, P1, K1)* K3
Row 9 (RS): *P3 (C6FKPK, K3)* P3 (cable row)
Row 10 (WS): *K3 (K1, P1, K1, P3)* K3
Row 11 (RS): *P3 (K3, K1, P1, K1)* P3
Row 12 (WS): *K3 (K1, P1, K1, P3)* K3
Row 13 (RS): *P3 (K3, K1, P1, K1)* P3
Row 14 (WS): *K3 (K1, P1, K1, P3)* K3
Row 15 (RS): *P3 (K3, K1, P1, K1)* P3
Row 16 (WS): *K3 (K1, P1, K1, P3)* K3
Row 17 (RS): *P3 (K3, K1, P1, K1)* P3
Row 18 (WS): *K3 (K1, P1, K1, P3)* K3
Row 19 (RS): *P3 (KPKC6F, K3)* P3 (cable row)
Repeat rows 2-19 until desired length.
Cable Knitting Pattern Inspiration
This cable stitch pattern is a beautiful stitch to create a thick & cozy fabric for your next project!
Suggested Project Ideas:
Hats
Sweaters
Sweater Sleeves and Cuffs
Headbands
Scarves
Blankets & Pillows
Shawl
Mittens
Suggested Trim:
Rib Stitch
Seed Stitch
Garter Stitch
Knitting Abbreviations
*– * – repeat between *asterisks* to the end of the round
CO – cast-on (long-tail cast-on method)
C6FKPK – cable 6 front – left cable cross – slip 3 stitches from the left needle onto cable needle and hold it in the front of your work, K1, P1, K1 and then knit the 3 stitches off the cable needle
K – knit stitches (example: K1 means to knit 1 stitch)
KPKC6F – cable 6 front – left cable cross – slip 3 stitches from the left needle onto your cable needle and hold it in the front of your work, knit 3 stitches and then K1, P1, K1 off the cable needle
P – purl stitches (example: P2 means to purl 2 stitches)
RS – right side of work
WS – wrong side of work
Note: This stitch includes 2 left cable crosses, no right cable cross, so that helps simplify it, a little. 😉
Right Side Rows : Front of Your Work

Textured Cable Stitch Swatch Instructions
Equipment
- Knitting Needles (Recommended Size for Yarn)
- Stitch Markers (optional)
Materials
- Any Yarn
Instructions
Knit flat using straight needles:
- CO 21 STS
- Row 1 (RS): *P3 (K1, P1, K11, K3)* P3
- Start Repeat:
- Row 2 (WS): K3 *(P3, K1, P1, K1)* K3
- Row 3 (RS): *P3 (K1, P1, K1, K3)* P3
- Row 4 (WS): K3 *(P3, K1, P1, K1)* K3
- Row 5 (RS): *P3 (K1, P1, K1, K3)* P3
- Row 6 (WS): K3 *(P3, K1, P1, K1)* K3
- Row 7 (RS): *P3 (K1, P1, K1, K3)* P3
- Row 8 (WS): K3 *(P3, K1, P1, K1)* K3
- Row 9 (RS): *P3 (C6FKPK, K3)* P3 (cable row)
- Row 10 (WS): K3 *(K1, P1, K1, P3)* K3
- Row 11 (RS): *P3 (K3, K1, P1, K1)* P3
- Row 12 (WS): K3 *(K1, P1, K1, P3)* K3
- Row 13 (RS): *P3 (K3, K1, P1, K1)* P3
- Row 14 (WS): K3 *(K1, P1, K1, P3)* K3
- Row 15 (RS): *P3 (K3, K1, P1, K1)* P3
- Row 16 (WS): K3 *(K1, P1, K1, P3)* K3
- Row 17 (RS): *P3 (K3, K1, P1, K1)* P3
- Row 18 (WS): K3 *(K1, P1, K1, P3)* K3
- Row 19 (RS): *P3 (KPKC6F, K3)* P3 (cable row)
- Repeat rows 2-19 until desired length.
Abbreviations
- *– * – repeat between *asterisks* to the end of the round
- CO – cast-on (long-tail cast-on method)
- C6FKPK – cable 6 front – left cable cross – slip 3 stitches from the left needle onto cable needle and hold it in the front of your work, K1, P1, K1 and then knit the 3 stitches off the cable needle
- K – knit stitches (example: K1 means to knit 1 stitch)
- KPKC6F – cable 6 front – left cable cross – slip 3 stitches from the left needle onto your cable needle and hold it in the front of your work, knit 3 stitches and then K1, P1, K1 off the cable needle
- P – purl stitches (example: P2 means to purl 2 stitches)
- RS – right side of work
- WS – wrong side of work