Easy Knit Pumpkin Pattern, Free
This post may contain affiliate links. Please read my disclosure policy.
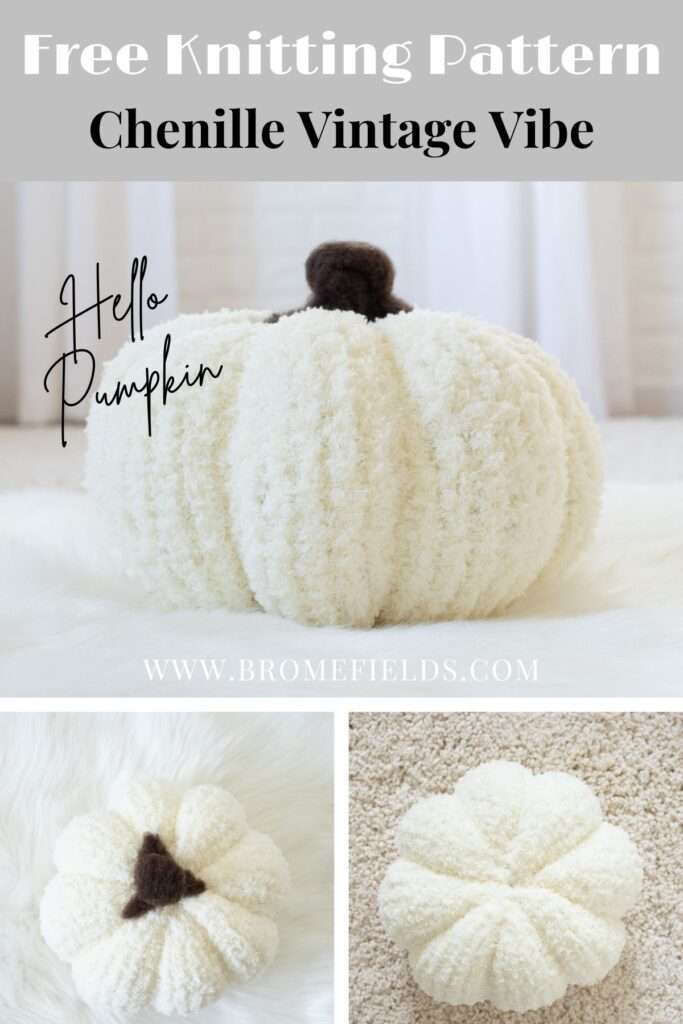
Learn how to knit the perfect pumpkin for your fall home décor.
This is a free & easy beginner knit pumpkin pattern.
It’s knit in the round, using only knit stitches.
OR you can knit this flat in stockinette stitch.
Either way, there’s no shaping!
These easy to knit pumpkins make for a perfect beginner project! Just watch the video tutorials below to help you knit your very own pumpkin patch.
Other pumpkin patterns you might like:
Are you looking for a large {huge} knitted pumpkin, a fur pumpkin to squeeze or a rustic farmhouse pumpkin pattern?
WHAT YOU’LL LOVE!
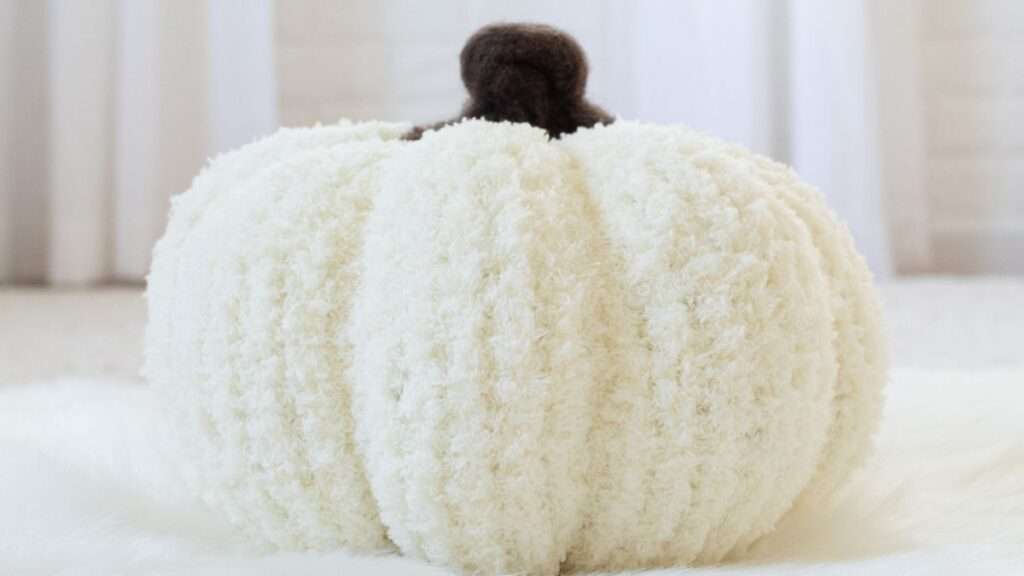
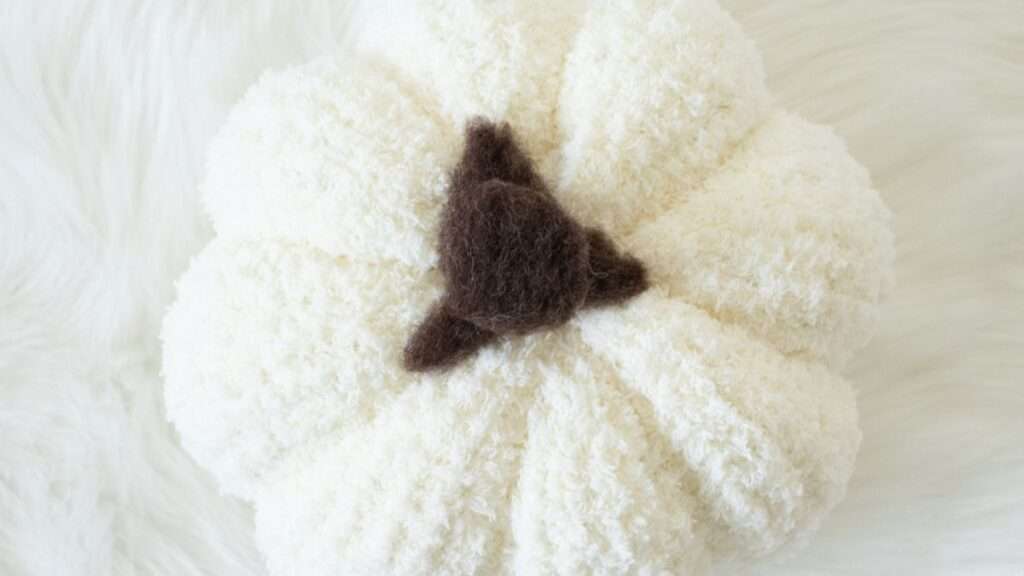
- Nostalgia. Finding comfort in the memories of the past {Snuggling in Grandma’s chenille blanket’s}.
- Style. The perfect pumpkin lines that the yarn naturally creates.
- Squeezability. It’s so soft & squishy!
- Quick & easy. Beginner knitting pattern.
Are you ready to get addicted to knitting pumpkins?!
These knit pumpkin patterns are inexpensive, creative, plus you can get rid of some left-over yarn balls {so you can go buy more yarn!} which makes for the perfect fall project!
Knit a Jack O’Lantern:
Regardless of the yarn you choose, you can use this pumpkin pattern as a base pattern for your Halloween Jack O’Lanterns. How cute would that be?! Use some left-over yarn, felt or fabric to create a scary or funny face.
About
Available Sizes: Three
Pattern Format: Written Pattern, No Chart
Pattern Language: English
Skill Level: Beginner
Techniques
Knit Flat or in the Round
Knit Stitches
No Increases or Decreases
Stem Making
Materials
Yarn Weight: Bulky Yarn
Yardage: 50 – 145 yards {46 – 133 meters}
Suggested Yarn: Bernat Pipsqueak {chenille yarn}
Needle Size: US 10.5 {6.5mm} Circular Knitting Needles with a 16” {40cm} Cable
Darning / Tapestry Needle
Scissors
Stitch marker is optional, if you’d like to keep track of your rounds.
Details
Gauge: Exact gauge is not required for this project.
Finished Stem Measurements: 1 1/2″ wide x 1 3/4″ {4cm x 5cm} {as pictured}
Sizes
Finished/Stuffed Measurements:
Small: 6″ W x 3 3/4″ {15cm x 9cm} 50-55 yards {46-50m}
Medium: 9″ W x 5 1/2″ {23cm x 14cm} 95-100 yards {87-91m} 3.2oz {90g} unstuffed {pictured}
Large: 12″ W x 7 1/2″ {30cm x 19cm} 140-145 yards {128-133m}
Notes
Not reversible.
Use the stockinette stitch.
This is knit from the bottom up.
When knitting in the round you’re always knitting the right side of your work.
For the small pumpkin you’ll need a smaller cable to knit in the round or a longer cable to knit using the magic loop method.
Great leftover yarn project. The small pumpkin uses less than 1 skein of yarn.
Save it for Later
- Buy the ad-free, printer-friendly pattern in The Shop.
- Save it to your Ravelry Library!
- Pin-it to Pinterest for later.
Download & Print this Pattern
Do you enjoy working from a paper copy? Get the downloadable, printer-friendly PDF completely ad-free.
That way you can have lifetime access to it and download it to any device and view it from anywhere, without ads (and the pattern might not be around forever)
Pattern, Knit in the Round
 |
 |
 |
Cast-on 30{S}, 60{M}, 90{L} STS, join in the round.
Knit all rounds for about 6″ {S}, 9″ {M}, 12″ {L}
Save this pattern for later!
Jump to the “How to Finish” Instructions.
Pattern, Knit Flat
Knit Flat Option: The cast-on numbers are the same as if you’re knitting in the round. This pumpkin is knit using the stockinette stitch, meaning knit the right side and purl the wrong side, to your desired length, seam the edges together and then follow the remainder of the instructions above.
Cast-on 30{S}, 60{M}, 90{L} STS
Row 1 {WS}: *P*
Row 2 {RS}: *K*
Repeat rows 1-2 for about 6″ {S}, 9″ {M}, 12″ {L}
Seam the edges together.
How to Cinch the Bottom
With a long tail, thread your darning needle and pick-up every outside stitch of the cast-on edge. After that, you’ll want to cinch it up as you go. Whip stitch it across the hole to reinforce it {optional}. Push the tail into the center, tie a knot and leave the tail inside, you don’t have to weave in the ends.
Video Tutorial
How to Cinch the Top {Part 1}
Without binding-off, cut/break your tail. Leaving a long tail, thread your darning needle and slip all the remaining stitches off your working needles onto the thread. Stuff it before you cinch it closed.
Video Tutorial
How to Add Stuffing
Start by adding the stuffing to the outside edge and then fill in the center to your desired density.
Video Tutorial
How to Cinch the Top {Part 2}
At this point, you’re ready to cinch the top hole closed. If you have a delicate yarn that might break, you’ll want to take extra care with this step and cinch a little at a time working your way around all the stitches.
Go around a second time to reinforce it.
Keeping it cinched tightly, tie a knot and push the end into the inside of the pumpkin. If you have a long enough tail, use it to make another rib.
How to Make the Ribs
Once you’ve closed the top & bottom holes, starting at the top center, wrap your yarn around the top edge and tie a knot in it, thread it through a column of seed stitches to the bottom hole, cinch it and tie a knot to anchor it.
Expert Tip: Given that this yarn is furry and forgiving, for this pumpkin you don’t need to run the thread through the stitches, just go over the outside of the stitches and the yarn will blend right in.
Video Tutorial
Weave in the ends, or push them into the center of your pumpkin.
No blocking necessary. :)
How to Make the Stem
Materials:
Roving
Felting Needle & Pad
Stem Instructions:
Shape the roving and felt it to your desired shape and size and then lightly felt it to your pumpkin.
FAQ
Definitely! If you cast-on using the same number of stitches with a thinner yarn & smaller needles, you’ll have a smaller pumpkin.
If you cast-on using the same number of stitches with a thicker yarn & smaller needles, you’ll have a larger pumpkin.
Cast-on more stitches in any increment.
Cast-on fewer stitches in any increment.
|
|
|
|