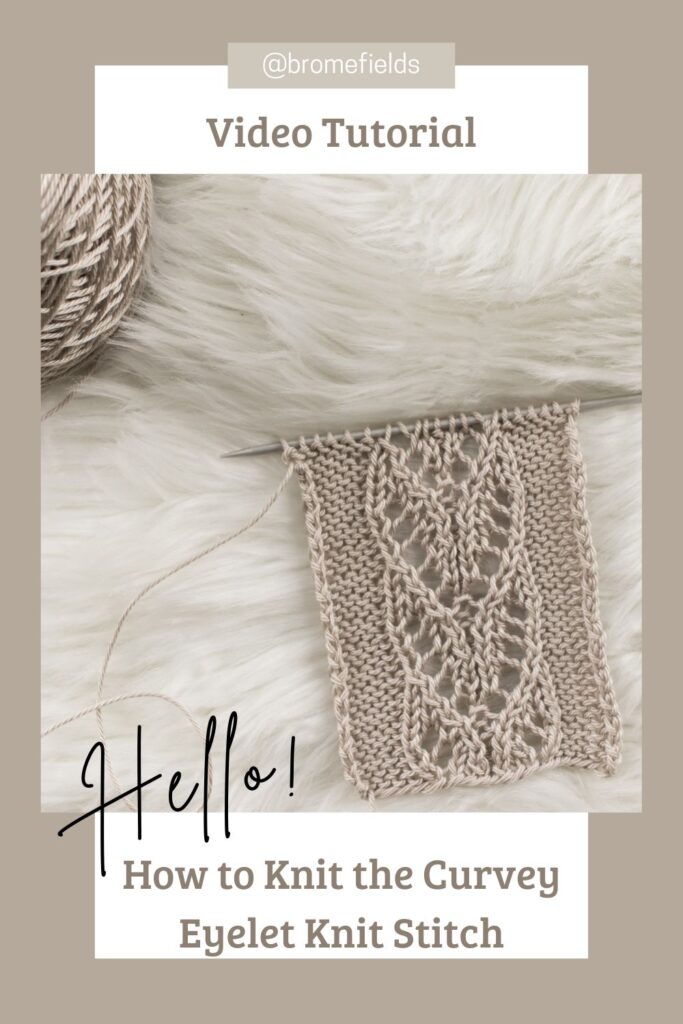
Curvy Eyelet Lace Knit Stitch
This post may contain affiliate links. Please read my disclosure policy.
Learn how to knit this beautiful curvy eyelet lace knit stitch which includes written instructions & a step-by-step VIDEO tutorial below!
Save this for later!
No spam, ever. Unsubscribe at any time.
Materials:
Yarn Weight: Super Bulky
Yarn: Lion Brand Wool Ease Thick & Quick
Needle Size: US 13 {9mm} Knitting Needles
Extras: Cable Needle
Notes:
All rows have the same number of increases & decreases, so you’ll always have the same number of stitches at the beginning and end of every row.
Gauge:
I chose a super bulky yarn because it’s easier to see the stitch definition in the photos and it’s easier to see what I’m doing in the video, however, you can use most any yarn you have in your stash!
Grab whatever yarn is calling to you and the recommended needle size on the label. I recommend using the “Goldilocks” test method, meaning you want to try different needle sizes and choose the needles that give you a stitch that’s not too loose or too tight, the one in the middle that’s just right. :)
Video Tutorial:
Checklist:
Row 1 {WS}: K2, P4, K1, P4, K2
Row 2 {RS}: P2, K1, YO, K1, K2TOG, P1, SKPO, K1, YO, K1, P2
Row 3 {WS}: K2, P4, K1, P4, K2
Row 4 {RS}: P2, K1, YO, K1, K2TOG, P1, SKPO, K1, YO, K1, P2
Row 5 {WS}: K2, P4, K1, P4, K2
Row 6 {RS}: P2, K2, K2TOG, YO, P1, YO, SKPO, K2, P2
Row 7 {WS}: K2, P4, K1, P4, K2
Row 8 {RS}: P2, K1, K2TOG, YO, K1, P1, K1, YO, SKPO, K1, P2
Row 9 {WS}: K2, P4, K1, P4, K2
Row 10 {RS}: P2, K2TOG, YO, K2, P1, K2, YO, SKPO, P2
Repeat rows 1-10, until desired length.
Border:
This stitch would look nice with a garter stitch border, something simple to really let the lace shine and be the focal point.
Blocking:
I didn’t block my swatch, however I think this stitch would benefit from a light blocking. I personally like steam blocking I use a steamer similar to this one at Amazon that I picked up at the dollar store and it works perfectly!
Abbreviations:
* – * – repeat between *
BO – bind-off in pattern
CO – cast-on {long-tail cast-on method}
K2TOG – knit 2 stitches together
K – knit stitches {K1 means to knit 1 stitch}
P – purl stitches {P2 means to purl 2 stitches}
RS – right side
SKPO – slip 1 stitch knit-wise, knit the next stitch, pass the slipped stitch over the knitted stitch
STS – stitches
WS – wrong side
YO – yarn over
What are your thoughts?
Do you like this stitch?
What are you going to create with it?
Would you like me to design a tank top or bralette… or something else with this stitch?
Let’s chat in the comments below! :)

Absolutely beautiful stitch! I’d love to see a tank top or a bralette because I live in Southern California where it can get up to almost 120° in the summer.
Isn’t it though! I really want to see it in a thinner yarn. Oh my, 120 is soo hot! I have some Pima cotton yarn that might make for a cooler top. :) I’m super excited to get started on it. We’re in a tornado watch for the night and I don’t think I can do math right now. It’s spring time in KS.