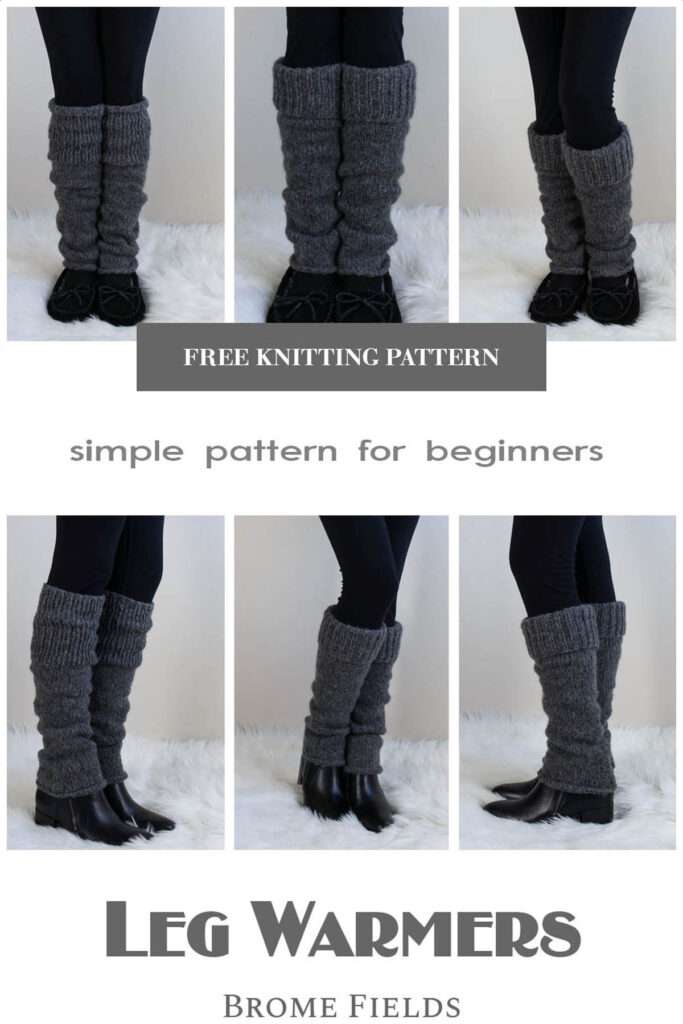
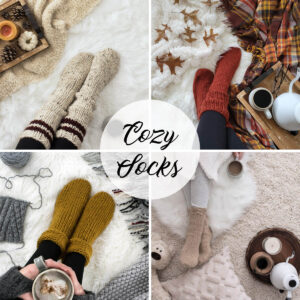
Fuzzy Leg Warmers Knitting Pattern (Free)
Knitting fuzzy leg warmers is so EASY, even for a beginner knitter! Stay extra warm, cute & cozy with this extra layer of squishiness that ya didn’t know you needed!
Scroll down to learn how to knit your very own pair of fuzzy wool leg warmers for women!
It’s sweater weather season and our legs need sweaters too!
Knitted leg warmers are one of the first things I grab to stay warm & cozy when the weather starts turning cold. They’re a great way to add some extra warmth, keeping legs nice and cozy.
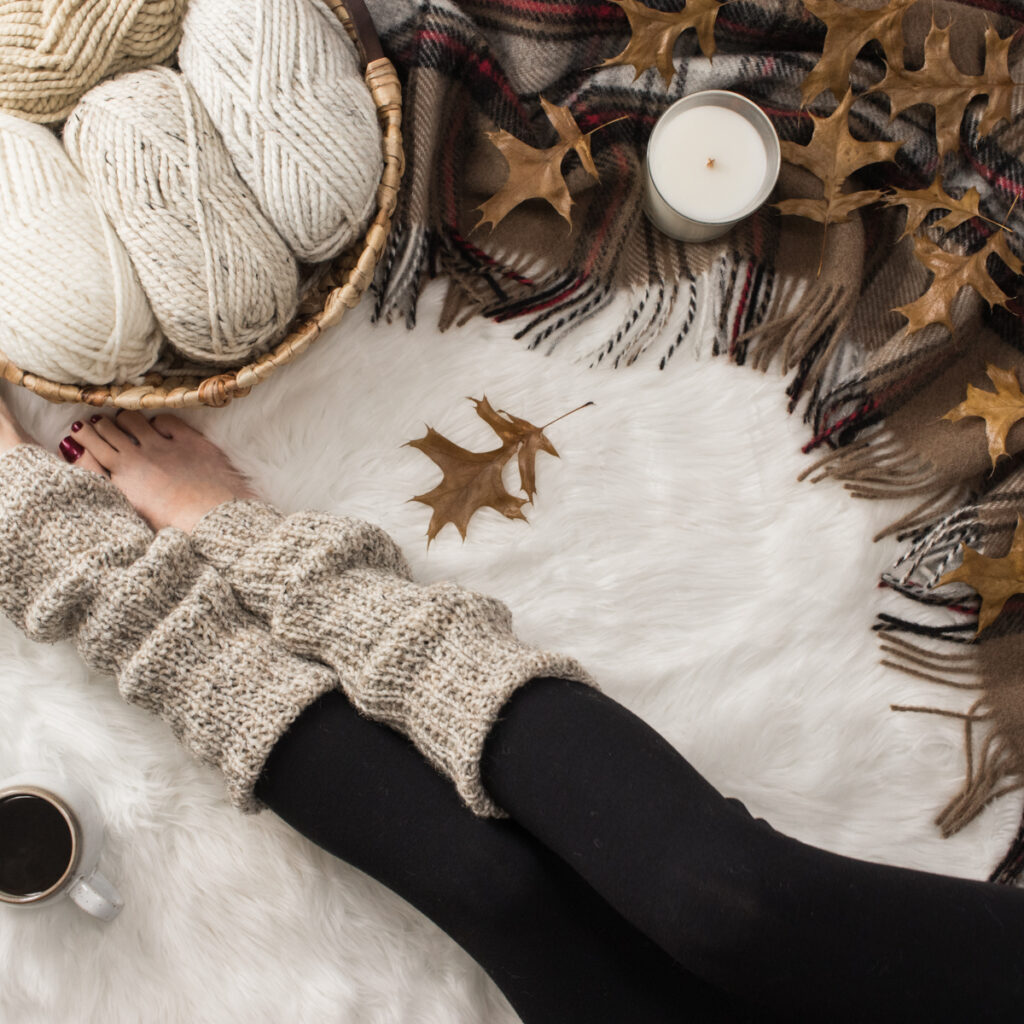
The 80’s leg warmers are back in style! I’ve been waiting for the day I can wear them in public and not be embarrassed. Seriously, they’re one of my favorite winter accessories! A must-have for any winter wardrobe. :)
This knit leg warmers pattern was inspired by my most popular pair of chunky leg warmers knitting pattern. It’s worthy of a worsted weight pattern! I’ll be wearing these every chance I get.
WHAT YOU’RE GOING TO LOVE!?
- Simple, meditative pattern
- Cute & stylish
- Stay extra warm & cozy
- No increases or decreases
About the Pattern
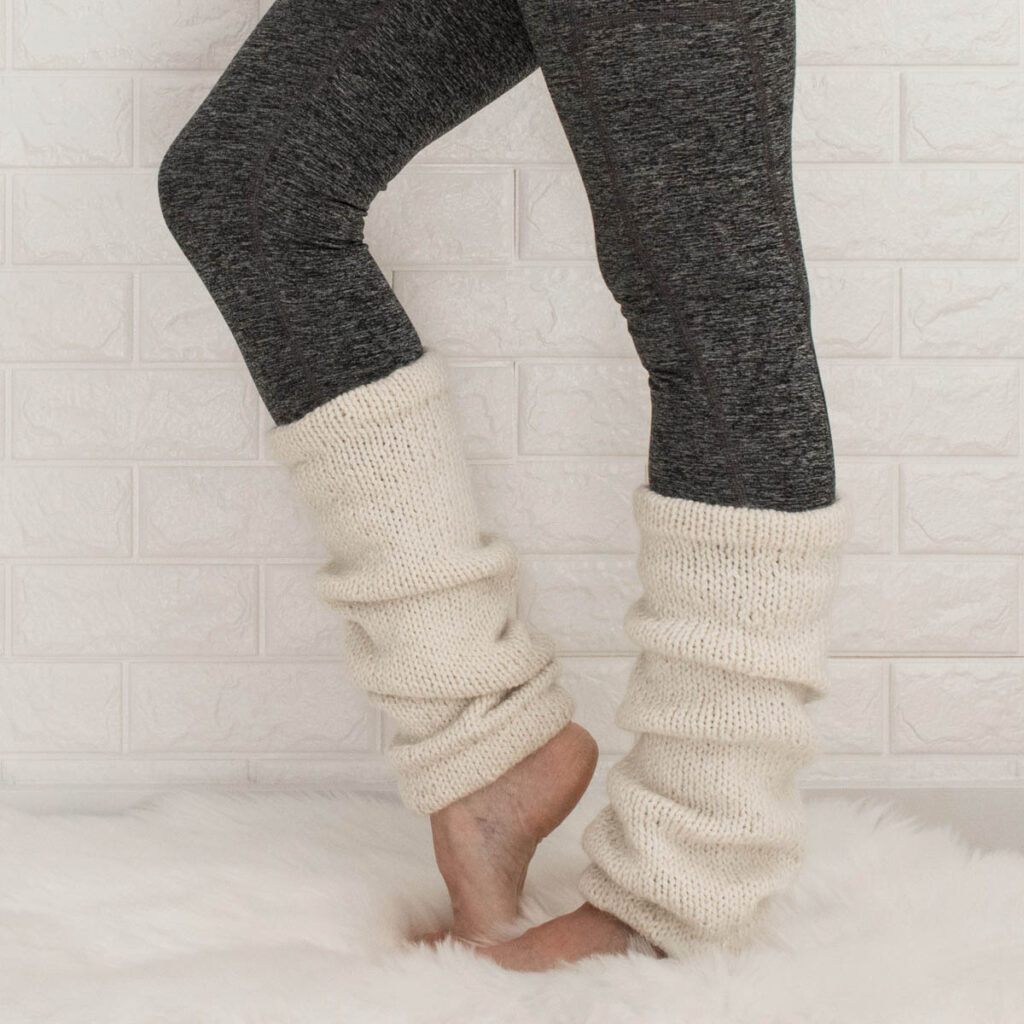
These women’s leg warmers are knit from the top down, starting with a nice squishy rib stitch creating cuffs. The rib stitch gives you lots of stretch to fit comfortably around your calves. Then they switch to the stockinette stitch to give you the perfect V’s that give you the classic knit stitch which results in a lovely squishy scrunch.
- Available Sizes: Three
- Pattern Format: Written Pattern, No Chart
- Pattern Language: English
- Skill Level: Beginner
Knitting Stitches Used
If you’re new to knitting and not quite ready to learn how to knit socks, leg warmers are a great alternative.
These leg warmers are so simple to knit!
- No increases or decreases
- No heel flap
- No toe shaping
Just knit & purl stitches on repeat. Easy enough to watch your favorite show and let your fingers do the work!
Stitches:
Knit & purl stitches only!
Techniques
This pattern includes 3 separate patterns, depending on how you’d like to knit them.
Choose from 3 different techniques:
- Knit in the round
- Knit in the round in the magic loop method
- Knit flat, back & forth on straight needles, and then seaming
Materials You’ll Need
This is a no waste pattern! I love it when I don’t have any left-over yarn. ;) I used 2 full balls of Wool and the Gang’s Feeling Good Yarn, one for each leg warmer. Just keep knitting until you’re about out of yarn. It really is that easy!
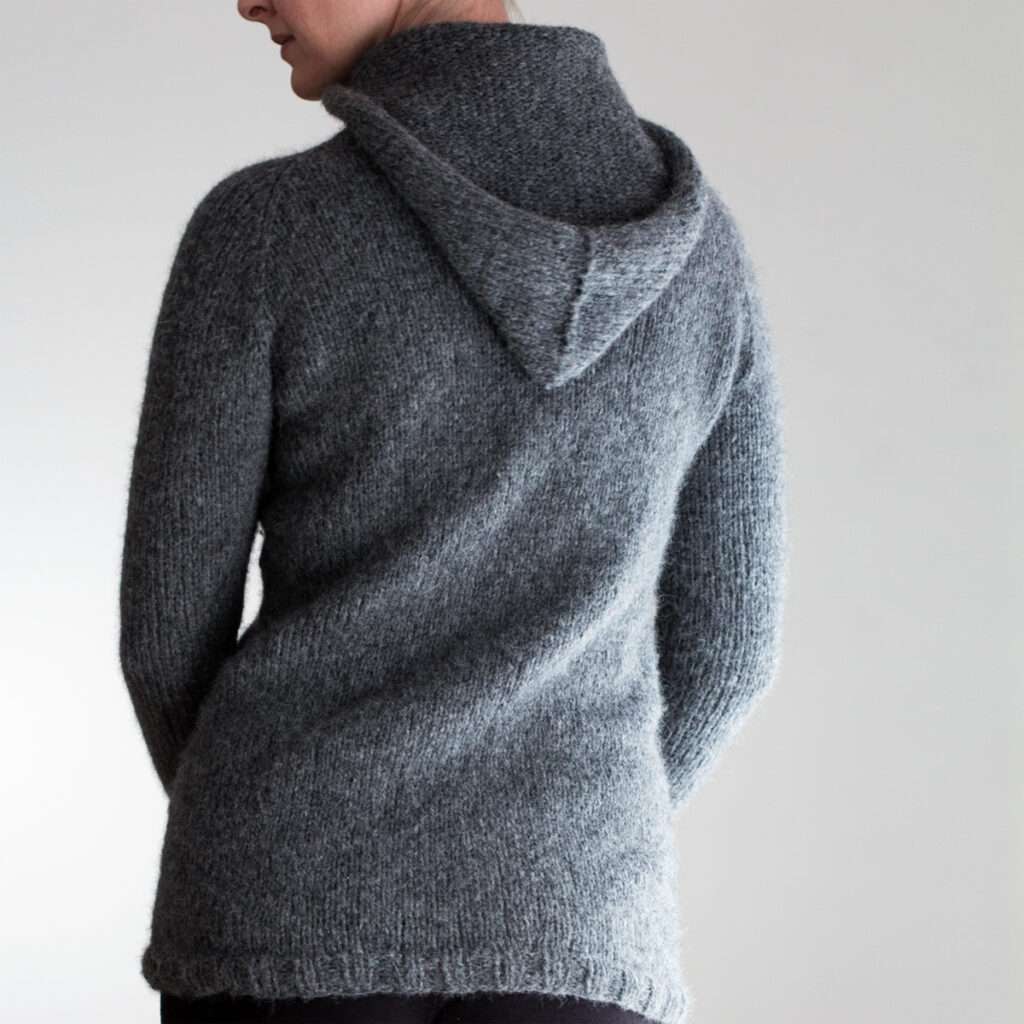
If you haven’t used this yarn before, you’re in for a BIG treat. This chunky wool yarn is soft & squishy & soooo warm! I knitted a hoodie with it a few years ago and it’s the warmest sweater ever! And that’s saying a lot coming from me because I’m always cold.
- Yarn Weight: Aran/Worsted
- Yardage: 275 – 280 yards (251 – 256 meters)
- Suggested Yarn: Feeling Good Yarn, Wool and the Gang
Yarn & Substitutions
Lion Brand Heartland is a great 100% acrylic substitution. It’s a little thinner and less fuzzy than Feeling Good Yarn, but it’s nice if you need a cheaper alternative or if you need an alternative to wool yarn. Check it out in this simple leg warmer pattern, so you can see how they compare.
Lion Brand Fisherman is a lovely 100% wool yarn substitution. The thickness is pretty close to the Feeling Good Yarn. It’s not as fuzzy, but just as squishy. This is one of those yarns I keep in my stash because it’s so versatile. Check out this leg warmer pattern that was featured in the Quick + Easy Knits in the Winter 2017 Interweave Magazine!
Lion Brand Vanna’s Choice is yet another worsted weight alternative yarn! Although it’s not as fuzzy either, it’s a popular go-to yarn. So, if you already have some in your stash this is a great project to use up a couple of balls of wool yarn. ;) Check out this pair of cable knit leg warmers to see how they worked up (the stitch definition is beautiful!)!
Expert tip: To get the fuzzy look with a standard yarn like the ones mentioned above, knit holding 2 strands of yarn, one of them being a fingering weight mohair.
If you’re looking for a different substitute, I recommend checking out YarnSub.com for other yarn options. They’re an excellent resource!
Needles Sizes
Knit flat: US 9 (6mm) Knitting Needles
Knit in the round: US 9 (6mm) Circular Needles with a 12” (30cm) Cable
Knit in the round, Magic Loop Method: US 9 (6mm) Circular Needles with a 32” (80cm) Cable
Note: To knit the small size in the round, you might need a 9″ (23cm) cable, knit flat or knit in the magic loop method.
Pattern Gauge
16.75 STS & 24 rounds per 4” (10cm) square, knit in stockinette stitch
For this pattern, you want to find the needle size that gives you a relaxed stitch, but not a loose stitch, not too tight and not too loose, but somewhere in the middle.
Wool and the Gang’s Feeling Good Yarn suggests using 5mm – 8mm US8 – US11 needle sizes, so you’ll definitely want to play with different sized needles or different tension techniques to get the gauge you’re looking for.
If you tend to knit on the loose size the US8 is a good place to start.
If you knit a little on the loose side, then a US9 is a good place to start.
If you tend to knit on the tight side, then a US 10 is a good place to start.
A US11 will give you a much looser stitch than needed for this pattern.
Measurements
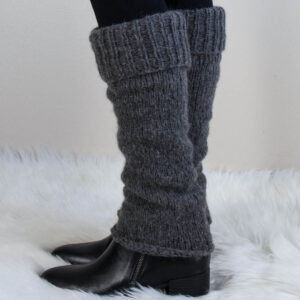
Model Calf Circumference: 13″ (33cm)
# of CO stitches for the leg warmers in the photo: 44 CO STS
Size Medium Measurements (not blocked): 5 1/4″ wide x 22″ (13cm x 56cm)
Weight: 3.5oz (100g)
Sizes
- Small: 10-12″ (25-30cm)
- Medium: 13-15″ (33-38cm)
- Large: 16-18″ (41-46cm)
The “hardest” part of this pattern is choosing the size. ;)
My calf circumference is 13″ (33cm) and I knitted the medium sized leg warmers, which are shown in the photos.
Notes
- Not reversible.
- Knit top down.
- Knit using the rib stitch and stockinette stitch.
Expert Tips
- If you’re going to wear them with jeans you might want to go up a size.
- Also, if you wear them with your jeans or yoga pants and then you want to wear them against your bare legs, they’re going to be a little stretched out until you wash them.
- If they’re a little loose you can wear them with tights or tall socks to help hold them up. ;)
Modification Options
- How to make leg warmers narrower, just cast-on fewer stitches in an even number (24, 36, 48 etc.)
- How to make leg warmers wider, just cast-on more stitches in an even number (32, 54, 68 etc.)
- If you’d like to you can add some ribbing to the bottom to match the top. I recommend 5-6 rows for a little bit of ribbing and then bind-off in the *K1, P1* pattern. I didn’t add a rib to the bottom because it’s a looser & stretchier stitch, so it’s loose and adds a little bit of flare. If you want the ribbing at the bottom, but not the flare, you can try knitting your leg warmers with a smaller needle size.
Above-the-Knee Option
If you’d like to knit long leg warmers that are above-the-knee, I recommend getting an extra ball of yarn, or two. Knit the ribbing the same length, but add length to the stockinette section. Knit them until they’re as long as you like, with as much scrunch as you like too! You may want to make the ribbed section longer if you have thicker thighs because it’s much stretchier than stockinette stitch, that way it stretches in all the right places. ;)
Can I Knit a Long Thigh-high Leg Warmers?
You’ll need to cast-on extra stitches since our thighs are a bit larger than our calves and then decrease them as you go down, so this would require a whole different pattern. The worst that could happen is you have to frog it and start over again… which is a part of knitting anyway. ;) What else are you going to do while you binge watch your latest favorite show?
How to Style Leg Warmers for Women
Which are soon to become your favorite winter accessory! ;)
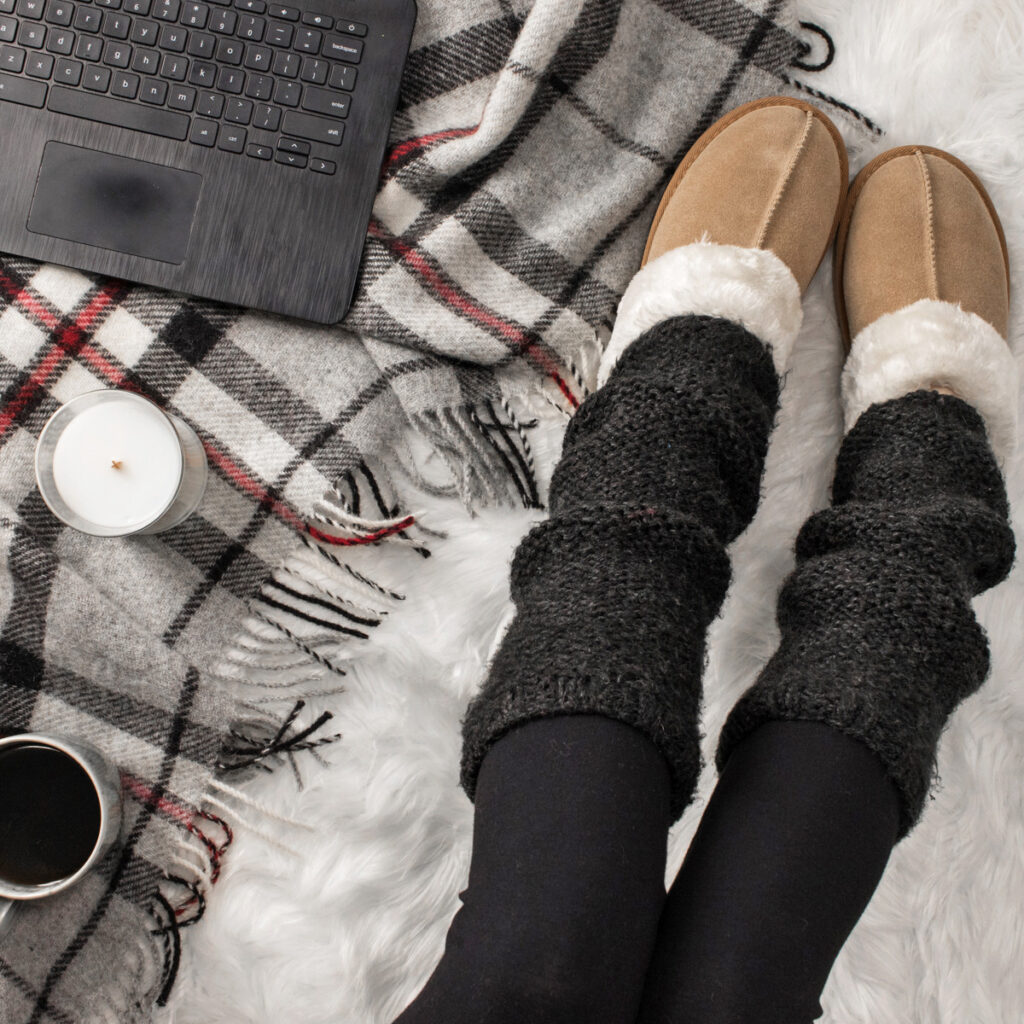
- Wear them with a pair of boots so they peak out of the top.
- Fold them over the top of your boots to add a little coziness to your outfit.
- Perfect to wear under a pair of boot cut jeans or wide legged yoga pants to keep your legs extra toasty.
- They make great yoga leg warmers too!
- Dress them up with a pair of clogs, mules or Mary Jane shoes.
- And, of course, they look cute with fuzzy house slippers ;)
- Pair some 80’s shoes with leg warmers.
- Keep your legs warm at dance practice.
- Plus, these gray black leg warmers go with all my dark colored outfits!
Knitting Abbreviations
*– * – repeat between * to end of round
BO – bind-off in pattern
CO – cast-on (long-tail cast-on method)
K – knit stitches (K1 means to knit 1 stitch)
P – purl stitches (P2 means to purl 2 stitches)
RS – right side
PM – place marker
STS – stitches
WS – wrong side
Save it for Later
- Buy the ad-free, printer-friendly pattern in The Shop.
- Save it to your Ravelry Library!
- Pin-it for later here.
Save this pattern for later!
Download & Print this Pattern
Do you enjoy working from a paper copy? Get the downloadable, printer-friendly PDF completely ad-free.
That way you can have lifetime access to it and download it to any device and view it from anywhere, without ads (and the pattern might not be around forever).
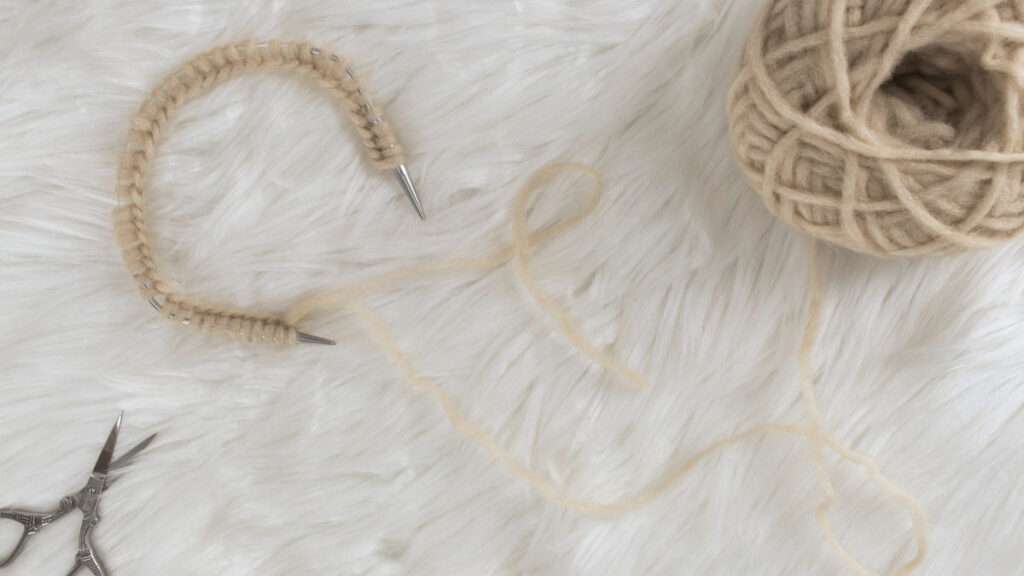
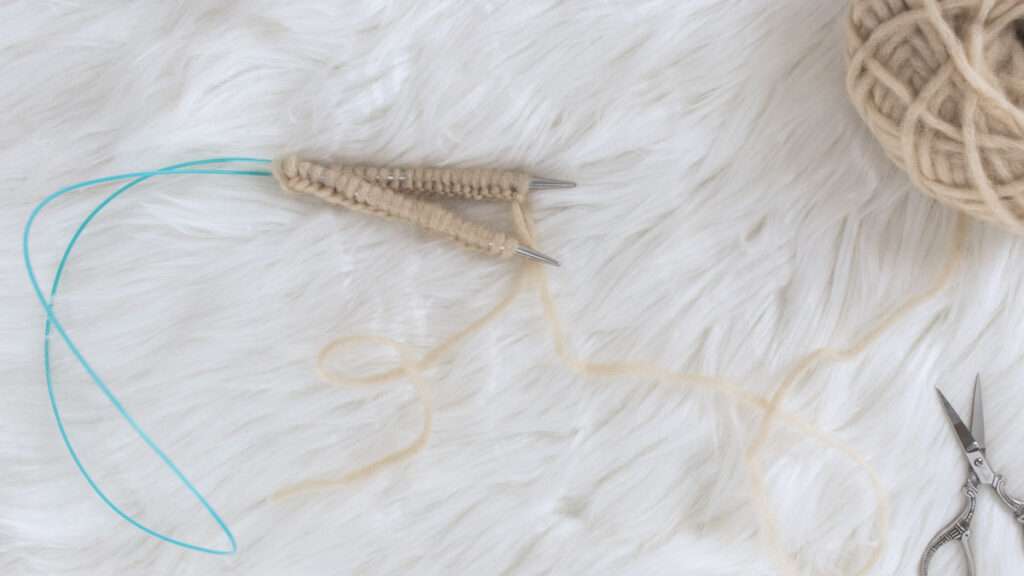
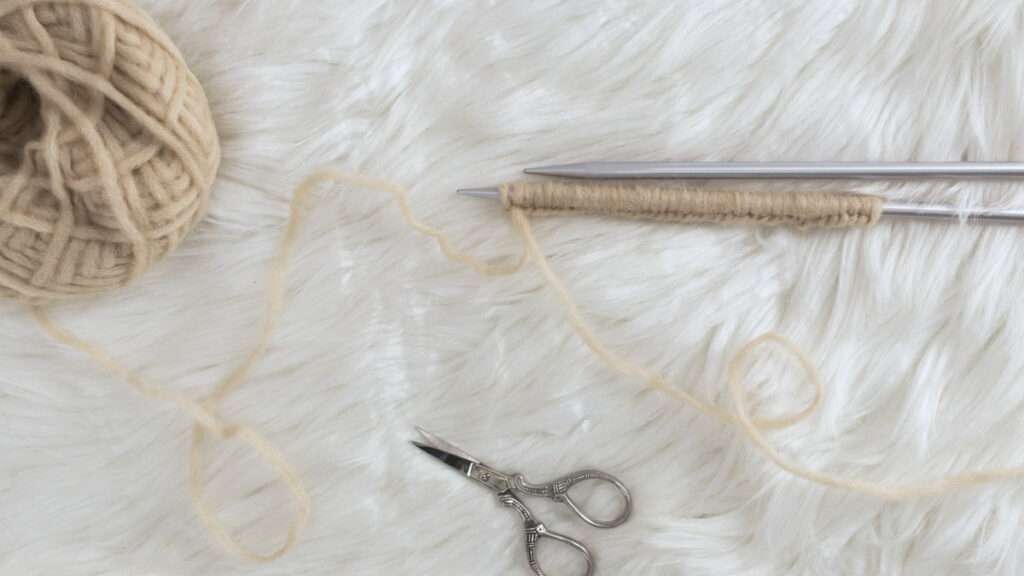
Technique #1 : Knit in the Round
 |
 |
 |
In this pattern you’re going to learn how to knit leg warmers in the round with a US 9 needle with a 12″ cable. They’re a little weird to use at first, but after a while you might just fall in love with them, especially when you don’t have to sew them after you bind-off.
Now I can add another WIP to my basket to switch between projects using different yarn weights, so I can knit longer.
Note: If you don’t want to use the US 9 needle with a 12″ cable, you can use DPN’s.
Also, When knitting in the round you’re always knitting the right side of your work.
Tips on Knitting with 12″ Circular Cable Needles
First of all, be patient with yourself. The first few rounds are awkward… if I’m being really honest, they’re a bit frustrating. However, it gets much easier when you have 5-6 rounds to hold onto and your stitches loosen up a bit.
One more note, the slicker the yarn, the harder it is to knit with these needles because the yarn slides around. I found the Feeling Good Yarn to be the easiest to work with. Followed by Lion Brand Fisherman yarn. Heartland yarn is the hardest to work with because it’s so slick. It’s not impossible, but it’s definitely not as super easy.
So, if you don’t like seams or seaming then I highly recommend giving these tiny needles a try. ;)
FREE Knitting Pattern
CO 36 (S), 44 (M) or 52 (L) STS, join in the round. There’s no need to use a place marker, unless you really want to.
For the first 7″ knit in the *K1, P1* pattern, or until desired length.
Then knit all stitches in stockinette stitch until desired length or you run out of yarn. When knitting in the round you’re always knitting the right side of your work.
Leave a long enough tail to BO loosely in the *K1, P1* pattern. This creates extra stretch and helps keep it from curling.
Weave in the ends.
Knit the second the same as the first.
No blocking required.
For the leg warmers in the photo, I CO 44 STS.
I did not block them. I think they’re perfect straight off the needles. That might be another reason why I love this wool yarn!
The finished measurements are 5 1/4″ wide x 22″ (13cm x 56cm)
I used almost all of one ball of yarn (there was a small scrap of yarn left-over) for each leg warmer and together they weigh 3.5oz (100g) Yay!
Technique #2 : Knit in the Round, Magic Loop Method
In this pattern you’re going to learn how to knit leg warmers in the round using the magic-loop-method.
What is the magic loop method?
In this form of knitting you’ll be knitting in the round, to knit in a circle, but because of the small diameter, you’ll be using a long cable to slide your stitches around on, so you’re only knitting half of them at a time.
For this pattern you’ll need US 9 (6mm) circular needles with a 32” (80cm) cable, or longer.
How it works: If you cast-on 20 stitches, split them in half, putting 10 on one needle and 10 on the other needle, with the cable hanging in between. Knit the stitches on the front, flip it around so the stitches are in the back, pull the back cable so that you can knit the front stitches, while leaving some of the cable hanging in between your needles, so you don’t create a circle.
Well, that sounds confusing, if you want to see it in action watch this Fingerless Glove Video Tutorial or VeryPink Knits tutorial on YouTube. ;) There’s lots of helpful videos out there.
Learning how to knit in the magic loop method really opened up my options for knitting more patterns, without seaming. For example: baby hats, socks, leg warmers, fingerless gloves, sweater sleeves, etc.
FREE Knitting Pattern:
CO 36 (S), 44 (M), or 52 (L) STS. Split 18 (S), 22 (M) or 26 (L) onto each needle, join in the round. There’s no need to use a place marker, unless you really want to.
For the first 7″ knit in the *K1, P1* pattern, or until desired length.
Then knit all stitches in stockinette stitch until desired length or you run out of yarn. When knitting in the round you’re always knitting the right side of your work.
Leave a long enough tail to BO loosely in the *K1, P1* pattern. This creates extra stretch and helps keep it from curling.
Weave in the ends.
Knit the second the same as the first.
No blocking required.
For the leg warmers in the photo, I CO 44 STS.
I did not block them. I think they’re perfect straight off the needles. That might be another reason why I love this wool yarn!
The finished measurements are 5 1/4″ wide x 22″ (13cm x 56cm)
I used almost all of one ball of yarn (there was a small scrap of yarn left-over) for each leg warmer and together they weigh 3.5oz (100g) Yay!
Technique #3 : Knit Flat
In this pattern you’re going to knit the leg warmers flat, row by row, back & forth.
CO 36 (S), 44 (M), or 52 (L) STS.
Ribbing:
For the first 7″ knit in the *K1, P1* pattern, or until desired length.
Stockinette:
Row 1: Knit all stitches on the right side of your work.
Row 2: Purl all stitches on the wrong side of your work.
Knit in stockinette stitch until desired length or you run out of yarn.
Leave a long enough tail to BO loosely in the *K1, P1* pattern. This creates extra stretch and helps keep it from curling.
Sew the side edges together.
Weave in the ends.
Knit the second the same as the first.
No blocking required.
For the leg warmers in the photo, I CO 44 STS. I did not block them. I think they’re perfect straight off the needles. That might be another reason why I love this yarn!
The finished measurements are 5 1/4″ wide x 22″ (13cm x 56cm)
I used almost all of one ball of yarn (there was a small scrap of yarn left-over) for each leg warmer and together they weigh 3.5oz (100g) Yay!
Happy Knitting!
I hope you love your fuzzy leg warmers as much as I do!
More Leg Warmers Knitting Patterns you’ll love…
|
|
|
|